9. Definitions
Finally, it is time to add the one numbered clause that is still missing from our source document, and that is the definition list. Now definition lists in ClauseBase are generated centrally, and reflect all of the content that is included in the terms menu. So the concept labels that you have chosen for your individual concepts, as you can see here, will be reflected in the definition list. As well as the definition that has been assigned to that concept label.
Before we move on to actually creating a definition list -, let’s take one final look at our termination clause that we automated previously. There is still one minor correction that we need to make which is, if you take a look at paragraph 5.1 you can see that it says either the party, because it just says #party here in the content body. If we drop that article by inserting a dash symbol behind the hashtag, then you can see that this is grammatically correct.
Create a definition list
Now moving on to definition lists, they are generated by clicking the plus icon in the top left-hand corner and selecting definition list. These definition lists behave mostly just as any other clause, they are however ad hoc in nature. So of course they are exclusive to this particular document. If you select the confidentiality clause and then generate the definition list, then it will appear below the selected clause. If you remove it and make sure that you don’t have any clause selected, then the definition list appears at the bottom of the document, when it is generated.

Either way, we can move it all the way up to the first article, by just using the arrow icons.
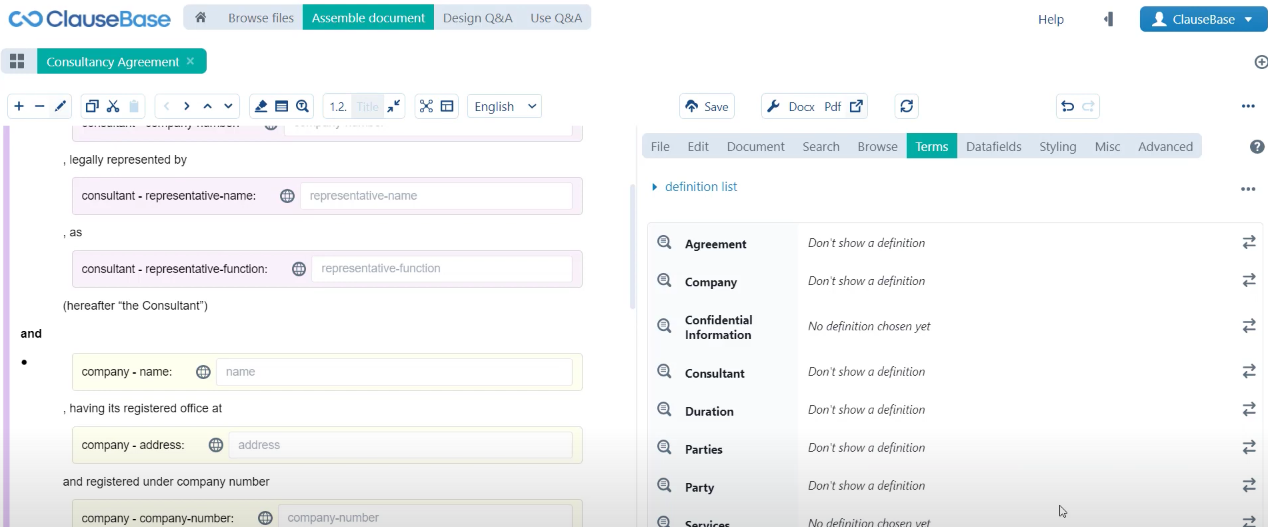
Then you can see that the definition list is still empty, as I said earlier, it is in the terms menu that you will actually define the content for what needs to appear in the definition list. Here you can see if you click this arrow icon next to the individual terms, you will first of all receive an overview of all the definitions that ClauseBase has found for this concept in the library. In this case we haven’t really created any definitions yet, so it’s not going to find many of them.
Ad hoc or library definition
You can then either create a new one ad hoc or in the library. Obviously, the difference here again, being the same as the difference between ad hoc clauses and library clauses. In that library clauses can be reused through our different documents, whereas ad hoc or rather library definitions can be reused through our different documents, whereas ad hoc definitions are really limited to this one document.
You can also explicitly indicate that you don’t want to show a definition and since our base document, our source document, only really features two definitions, confidential information and services, we don’t actually have to create any definitions outside for those terms. So we can indicate for every single definition that isn’t confidential information or services that we don’t want to show a definition. Now this doesn’t need to happen in order to make the definition list function. It’s more of a mental note for yourself that you didn’t choose a definition but that was by design.
Create a definition
So there are two ways of adding definitions another quick look at the source documents, the document also reveals that.
- You can either have this text simply included for the definition itself.
- Or you can refer to a clause where a definition was included in line or a term was in in any other way explained in the documents.
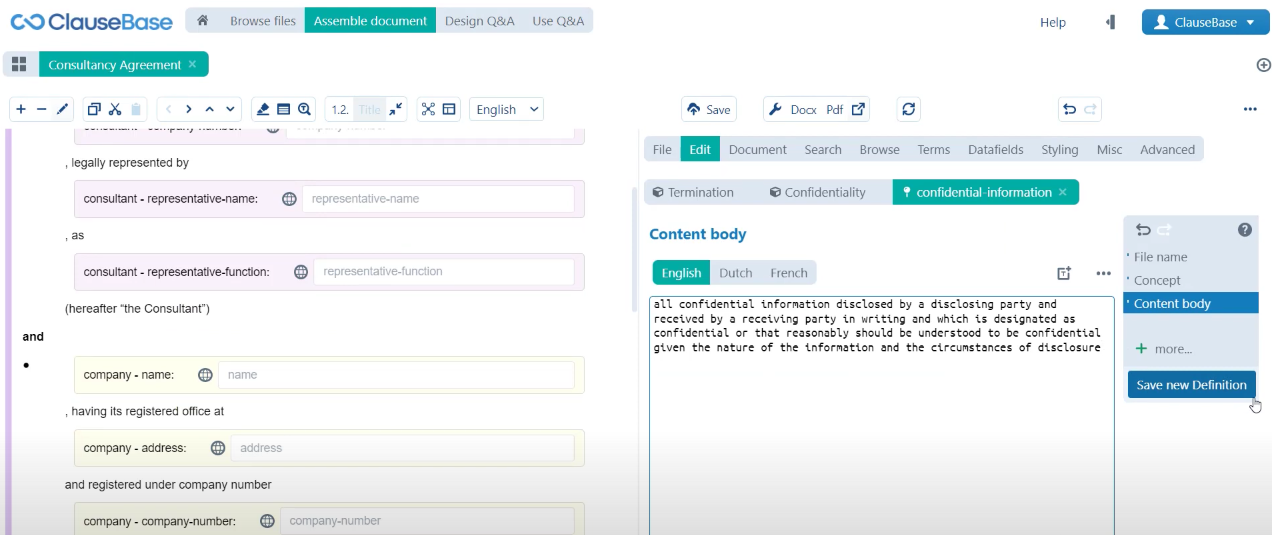
Start with the confidential information definition, copy this text and then if you click the arrows icon you can see that a definition was already found in the library. But here we’re going to create our own.
- So we’ll click create a new in library. We’ll navigate to the library, because just as you created a concepts folder you will now also want to create a definitions folder. For much the same reason. First of all it allows you to store that content centrally in one location but also non-class authors don’t really need to interact with these files and so for them these folders will typically be hidden.
- Create a definitions folder, click select folder, automatically the file name is already taken from the name of the concept that this definition is attached to. Automatically the link between the definition and the concept is also created on the spot. And as for the content body, it’s just a matter of inserting the right content, we don’t need to include the actual name of the term itself. We only need to include the actual content of this definition, we can even remove the punctuation marks at the end of the definition because that is something that ClauseBase allows you to define centrally in the styling settings. We will come back to this later in this chapter.
And so with that out of the way we can simply save this new definition, and if we then go back to the terms menu you can see that now a second option is available to us and we can just click this definition to activate it in the definition list. So as you can see the definition list simply reflects the contents that was included in the terms menu. That’s one way to create a definition.
In line definitions
Another way is to reference a certain clause where definition or whether term is defined in line. We already saw that, that is the case for the services clause. So the way that we approach that is: we first navigate to the services clause, we can open that clause up and we’re going to establish another link with this concept. So we’ll go to the links menu much as we did for cross references, we’ll establish an outgoing link with the services concept and then as you can see here, the standard default option is to have this clause implement a certain concept.
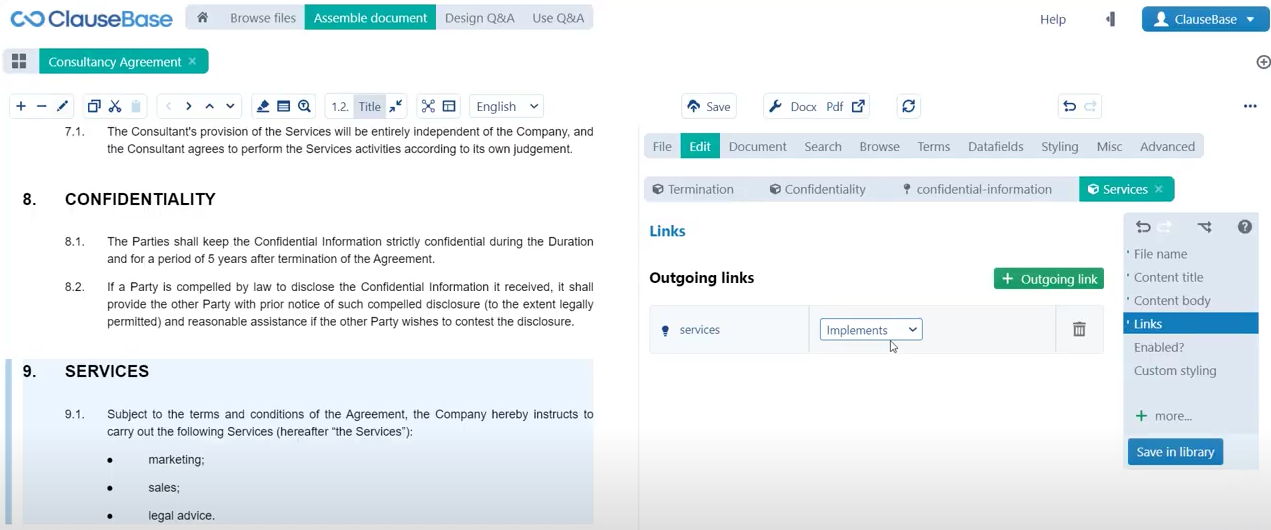
Now that’s what you use for cross references and what we looked at earlier, but you can also open up this drop-down menu to select that this concept or rather this clause is a definition for this concept. If we now save that in the library and go back to the terms menu, you can see that a new default definition was assigned to this services clause. If we scroll up, that the services definition has been added, so these are two practical ways to work with definitions.
Styling of the definition list
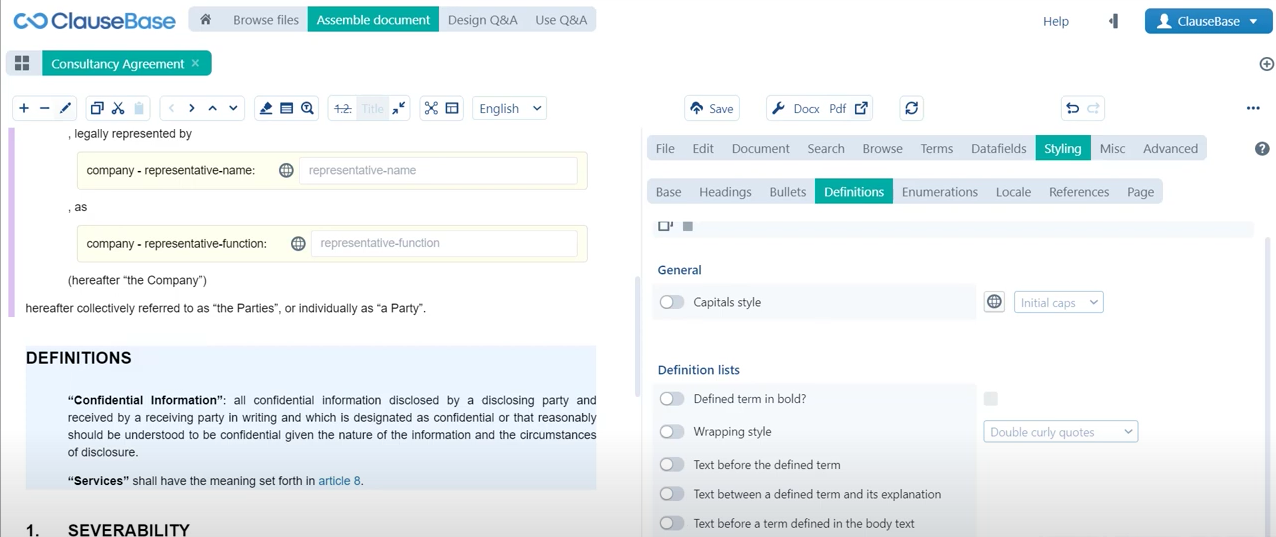
Now there is still one optimization that we need to perform in the sense that the source document has a peculiar setup when it comes to the to the definitions clause. So there is no number assigned to this clause and the definitions themselves are arranged in a list of bullets. The way that we can approach that is: well first of all like I said earlier, the definitions clause behaves much the same way as any other clause does. So you can easily select it and toggle off the numbering, however that of course turns off the numbering for the definitions themselves as well.
So here we’re going to have a quick look at the styling menu, specifically the definitions styling. As you can see there are many different styling settings, we need to be working with the definitions styling. And then if we customize the default style, we can indicate that we would like the definitions to be shown as bullets. Then there’s all sorts of other different options, of course to fine-tune how the definition list should be styled.
For now we only need this one and then as you can see here, this clause now reflects the clause in the source document. Save for one element and that is the fact that the title here is not definitions but definitions and interpretation. Again the definitions list functions much the same way as any other clause would so we can double-click that clause to open it up in the edit menu and here in the content title. We can then indicate that we want the title to be definitions and interpretation and then our clause accurately reflects the source documents.
Do you want to learn more about this chapter? Check out our help page on introduction to definitions and definitions styling.