11. Creating a questionnaire
Let's now move on to the final part of this tutorial series, creating a questionnaire from this document. Now we've looked at a range of different functionalities that ClauseBase has to offer, such as flexible terminology enabled by concepts, the fact that you can assign definitions centrally to these concepts, to these terms. The fact that datafields allow you to fill out variable information very easily and also enable certain conditional logic to be used. We've even looked at some styling elements, and so on and so forth.

But in many cases your end users will not need to have all of this flexibility and you will instead want to opt for a more rigid but intuitive mode of document creation. That is exactly where the Q&A mode comes into play. Q&A mode allows you to construct a layer on top of this a layer of questions, really on top of this document. That allows users to interact with this document in a more user-friendly way, in a more intuitive way. It just makes it more cosmetically appealing really, but since this is just a layer that is built on top of the document no actual changes occur, as a result of certain interactions within the Q&A. So the base document in document assembly mode and the Q&A, while they do communicate with each other to ensure that the proper structure is shown, can be used separately as well.
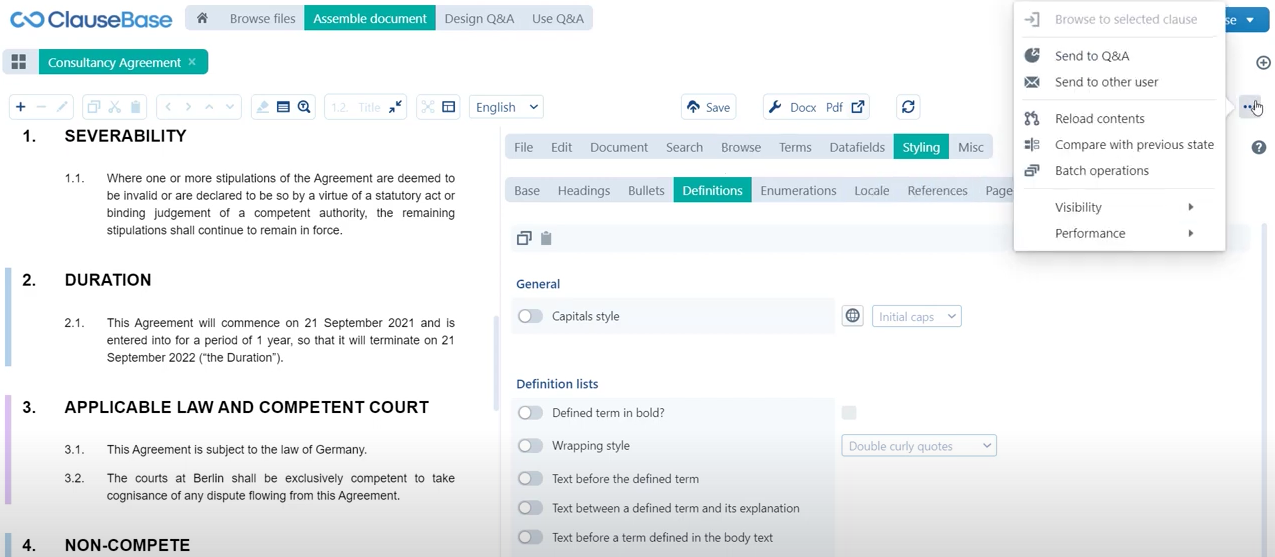
So for example we don’t even need to rearrange all these clauses first, because as you know currently the order of the clause is not yet in line with the source documents. That is actually something that we can come back to later and the Q&A will automatically follow all of the changes that we make. Now in order to start creating a questionnaire we can first of all save this document, to make sure that we’re working with the most up-to-date version. Then we’ll click these three dots and send this document to Q&A, which then inserts us into design Q&A mode where we have essentially an empty workbench, that we can use to craft different questions. And relating to the datafields that they correspond to, because as you remember datafields are essentially just ways of asking questions of the users. Those questions are then grouped into cards much the same way as datafields are grouped into concepts, to provide context.
Create questions
This is where we will be creating those cards and those questions, and as you can see there are multiple panes. You can actually hover over these panes to showcase what other different panes exist. Now there are quite a few of them, the only ones that we currently need to finish up on this tutorial, is the cards menu or the cards pane, and the batch create pane.
- In the cards pane we will have an overview of all of the different cards that are already created
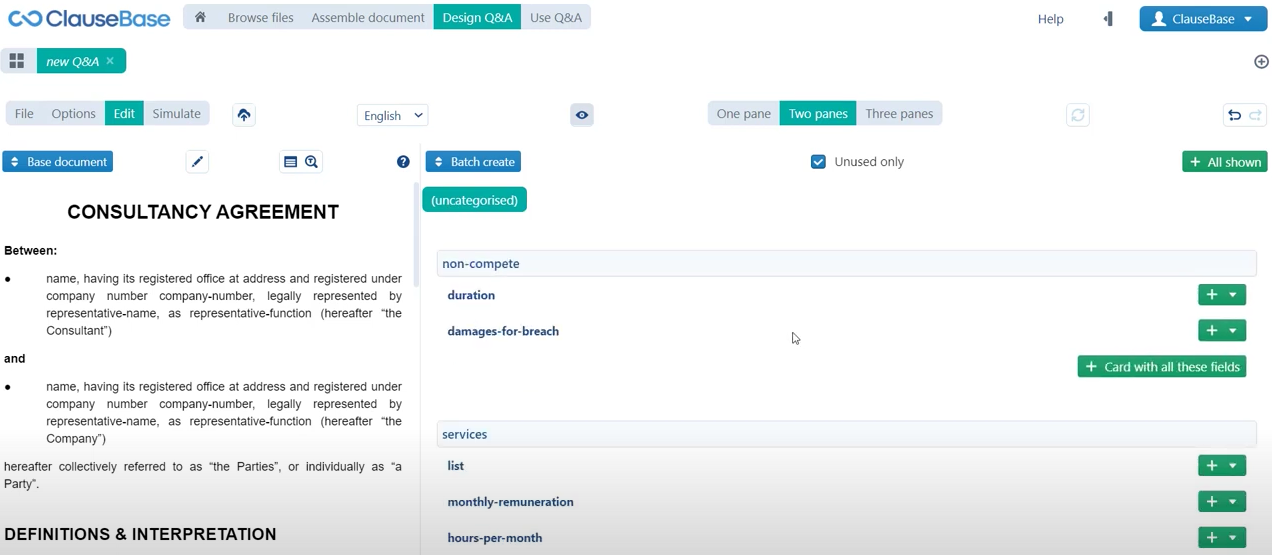
- In the batch create menu we have an easy way to actually create these cards and if you click this uncategorized option you will see that we have an overview of all of the datafields, used in this document and their corresponding concept that they are attached to.
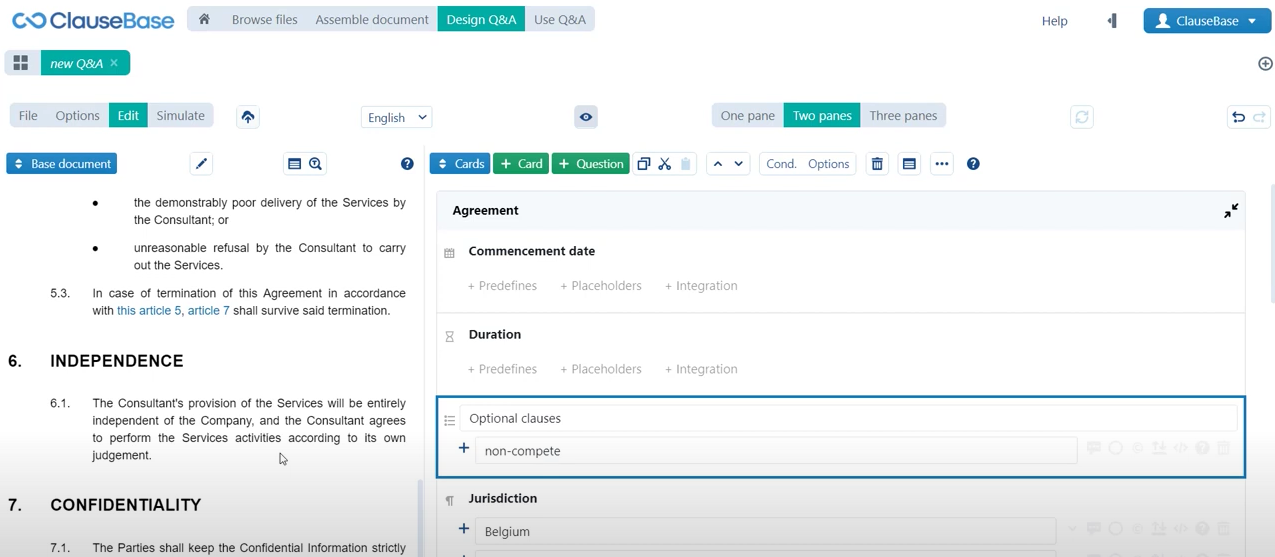
Now if we want to create several questions and an appropriate card for those questions in one go, we can actually just click card with all these fields. And as you can see we just did that for the agreement concept, so all of the datafields attached to the agreement concept have now been inserted.
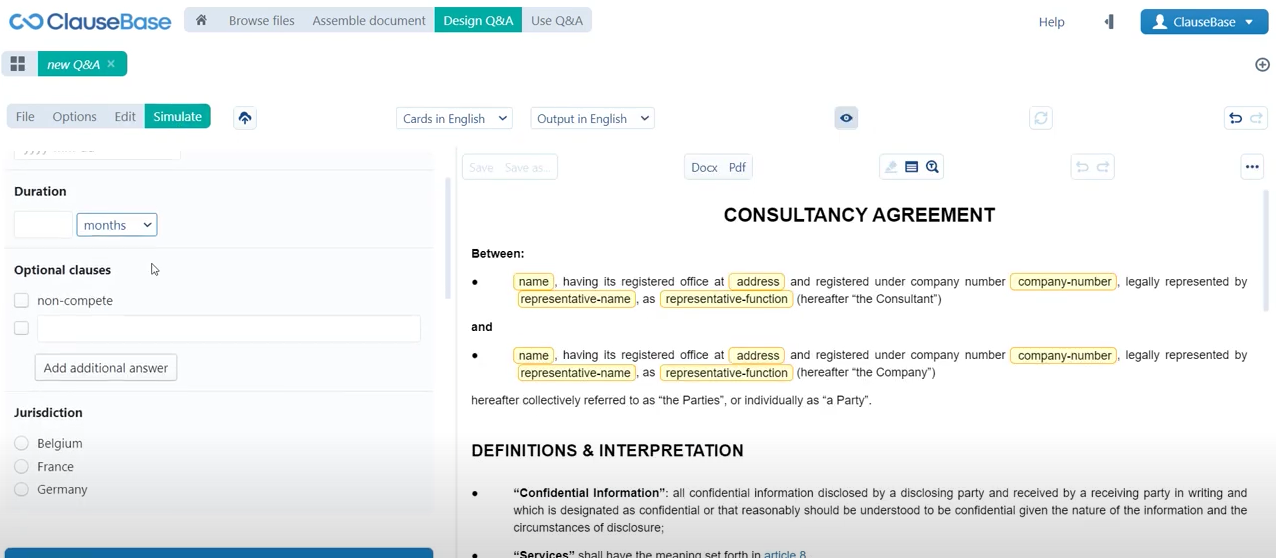
If we take a look at the simulate menu you can see that this is what that would essentially look like for the end user. Now since those questions actually take the name or the title of those questions take the name of the datafields. You may be interested in in making this a little bit more cosmetically appealing, cleaning those questions up a little bit. Again you’re welcome to do so, any changes here made in the Q&A don’t immediately affect the document assembly mode or the underlying concepts, or anything like that. So you’re very much free to remove these dashes which you would need for a datafield, but don’t need for this Q&A style approach.
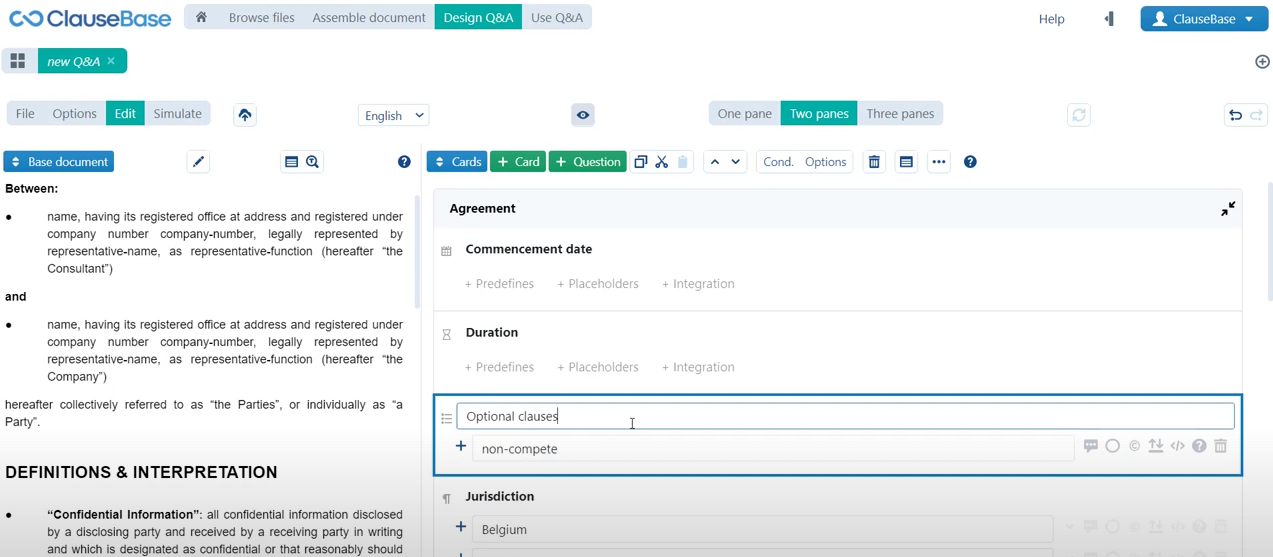
So here in the cards menu you can see that we’ve just created our first card. We can also go back to the batch create menu and see that we don’t necessarily need to make individual cards each time. We can also select an individual question and indicate that we want to add it to an existing card, like for example the agreement card. If we then go back to the cards menu you can see that the jurisdiction datafield is added and that also all the predefines that were attached to this datafield, have also been taken over from this concept. Now if we go back to the batch create menu, we can finish up on the creation of all the necessary datafields by just creating all of these cards with all of these different fields:
- Create one for consultant;
- Create one for company;
- Create one for the non-compete clause;
- Create one for the services.
You can also see that if we go back to the cards menu, that we can move these. We can move these cards around, we can change the order by just using these arrow icons. We can also do the same for the order of the questions and of course the main thing that we still need to do once we have actually created all of these questions is to clean them up a little bit. Make sure that they are cosmetically appealing.
The question “legal-person” is a prime example of a question that should be formulated in a bit of a better way. For example here we’re not going to ask legal dash person, we’re going to ask: is the consultant a legal person? That makes a lot more sense, aside from that question really the only optimization that we need to do or the primary optimizations that we need to do is:
- remove these dashes that were necessary for datafields but are not necessary here. If you want to make sure that the imported or the batch created questions immediately adhere to a proper sort of structure, where we don’t really need to improve the quality of this question. Remove these dashes, you can also attach labels to your datafields that’s not something that we looked at in this particular tutorial series.
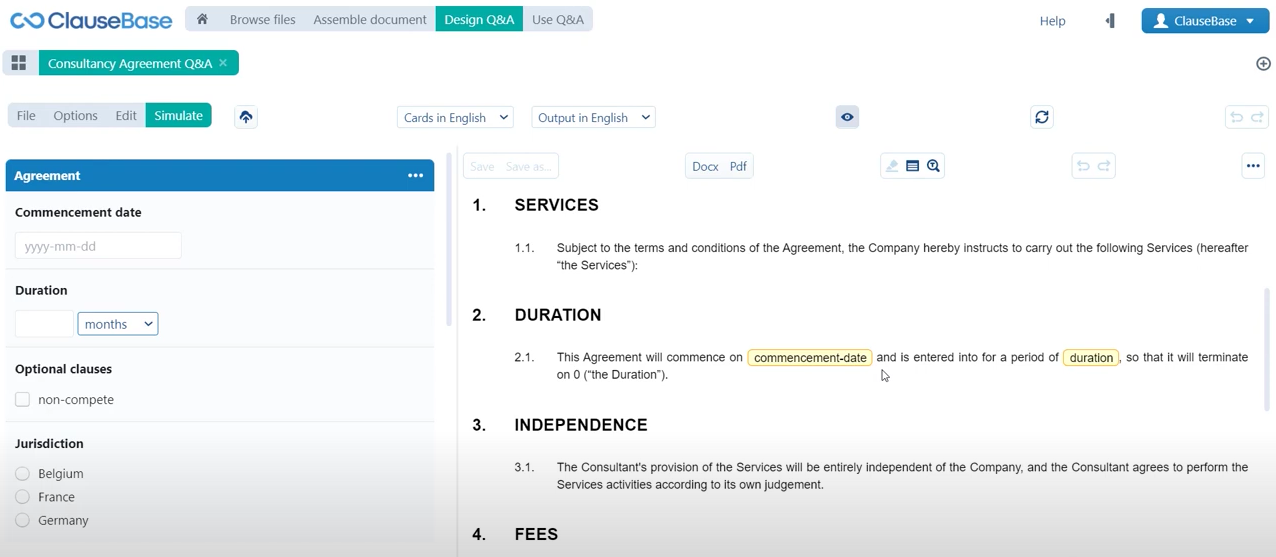
So with all of that out of the way, we now have an essentially perfect questionnaire. As you can see here, we can interact with every single datafield in the entire questionnaire.
Add conditions to questions
Now there is one type of improvement that we can still make. If you take a look at this question is the consultant a legal person? You will remember that as being one of our conditional logic questions, then you can see here that the question can be answered with yes and that the legal person text will be displayed. But in that case the birth date question is still being asked vice versa. If we answer “no” here, then the natural person text will be displayed. But the company number representative name and representative function questions are still asked. So here we can again use conditional logic to optimize the way in which this questionnaire is going to portray all of its different questions. We can do that immediately for example for the company number question.
We’ll attach a condition to that question:
- First select this question and then click the abbreviation of condition here.
- Just go through the condition creation wizard so to speak, so here we have a bunch of different elements that we can use to establish our condition. 99 Of conditions are used by answering or are established on the basis of an answer to a certain question. The answer or the rather the question in our case is of course: is the consultant a legal person? The answer for this question to be activated is: needs to be equal to true. So in other words if the user answers yes to the question: is the consultant a legal person? Then this question will be shown.
- Instead of recreating that entire condition for the representative name and the representative function, we can copy this condition and just paste it for the representative name and paste it for the representative function.
We can do the same for the birth date only this time of course the answer needs to be false. Because it should only be shown if the consultant is a natural person. If we take a look at that now, you can see depending on whether or not we answer yes or no different questions appear altogether. So that no superfluous questions are being asked of the user. We can actually do one more example of that as well, so one of the questions with conditional logic attached to it as well, was the optional clauses list. One of those options of course that we created was the non-compete clause.
Add conditions to cards
If we scroll all the way down to the non-compete card, you can see that really these questions are only relevant if the answer to this question optional clauses was answered with at the very least the non-compete option. So instead of just attaching a condition to a question, we can also attach a condition to a card. By selecting the card in its entirety and adding the condition, only show this card if the answer to the question optional clauses has an item equal to. Since this is a list of text field, we are presented with different options compared to the true or false type datafields. We’ll just say has an item equal to non-compete and if we then simulate this you can see that if we select the non-compete option, this clause appears. Also this question or rather this card appears in the questionnaire. If we deactivate that then you see that no such card appears. There’s actually one more optimization that we can do, specifically in relation to that question.
Deactivate free answers
Now you will have seen in the simulate menu that we are given the option to fill out a free answer to this question as well. The reason for that and the reason why that is not the case for the jurisdiction datafield, for example. Is that we didn’t indicate in the predefined overview of this datafield, that free answers were not allowed. But of course we would prefer free answers to not be allowed, because we don’t have any conditional logic that can be used to generate optional clauses. So instead of going to the conditions menu, we will select this clause and go to the options menu where all sorts of different options exist. But the one that we need is the free answers which will indicate as being not allowed. If we then go to the simulate menu again you can see that no free options remain and that we can only fill out the non-compete option.
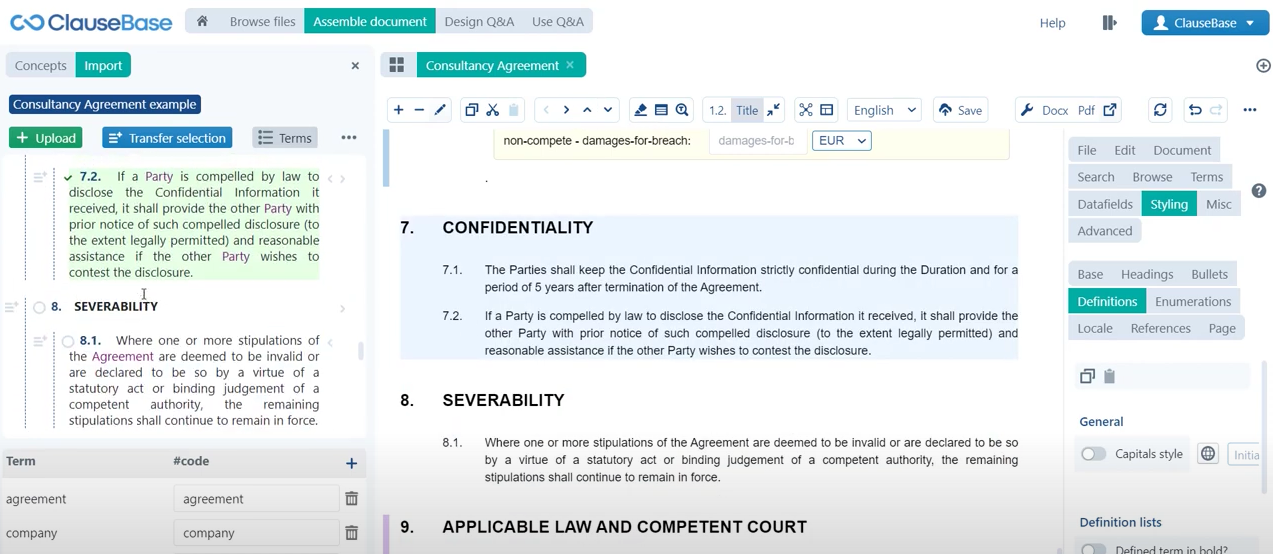
Now of course the Q&A mode is primarily focused on offering users the ability to interact with the datafields in a given document, there are other ways to interact with the documents that are currently not present in this Q&A. Like for example, flexibly switching between the terminology assigned to the consultant. You will remember that we did all sorts of things in the independence clause relating to the grammatical changes that need to occur, that’s flexibility. That’s currently reserved for the document assembly mode.
Now there are ways to also implement that sort of flexibility or give users the option to interact with that sort of flexibility in the Q&A mode but they’re not the scope. In the scope of this particular tutorial series, for that you will need to go to the changes pane. You will also see that definitions are not available for further interaction, that’s also something that for now is the sole domain of the document assembly mode.
Save the questionnaire
But other than that we are essentially done with this questionnaire. We just have to actually create this file and we’ll call this the consultancy agreement Q&A. As we click save Q&A, this file has now been created. Just to jump back to the point that we made earlier, I can show how the underlying document can still be altered a little bit, or the structure can still be altered a little bit. The Q&A will automatically take that shape of that document, so as you can see here currently the order of these clauses is still completely not in line with the source documents.
Interaction with document assemble
Let’s close this questionnaire and go back to our document assembly mode, where we can open up the import panel and try to recreate the order of our source document clauses.
- The services clause
- The duration clause
- The independence clause
- The fees clause
- The termination clause
- The non-compete clause
- The confidentiality clause
- The severability clause
- The applicable law and competent court clause
If we now save this document and open the questionnaire back up again, you will see that the correct order is now applied.
One final optimization that we can also perform here is, we can take a look at the datafields menu and see all of the values that have already been assigned to these datafields. Now if you take another look at the questionnaire you can see that if we don’t fill out any information, for example in relation to the commencement date or the duration. Then ClauseBase is still going to draw from the values that were inserted in document assembly mode to fill out something.
Now if that’s something that you want to avoid, if you just want these values to be empty. You can also I’ll just close this Q&A very quickly, you can also go into the datafields menu for the document assembly mode and click this icon right here and then say clear all datafields. So that all the values in all the datafields will be removed. If we then open up the questionnaire again you can see that all of these values are now empty.
So these are just some ways to improve the look and feel and the experience related to your Q&A, some more. With all of that out of the way, you should have been able to create this consultancy agreement, to complete this tutorial series.
Do you want to learn more about this chapter? Check out our help page on Q&A.
Now you’ve seen quite a few functionalities that ClauseBase has to offer. There is of course still more to learn. The help center (https://help.clausebase.com/frequently-asked-questions/) is a good first step if you want to dive into some more details. Also the links that were included in the previous chapters, definitely offer some more information as well. And of course there are a range of different tutorials that can help you further along the road as well!