4. Creating variable information
Now that we have imported the duration clause, we can see that there are a couple of placeholders. So typically, a user will be asked to fill out the commencement date, the duration and the termination date of the agreement. In Word you would have to do that manually. For each instance where that information is requested in ClauseBase these placeholders can be turned into fields of variable information that can be easily filled out by a user and can be repeated across the document for every instance where that information appears.
Datafields
That is where datafields come into play, datafields consist of three parts. Let’s use the commencement date placeholder to discuss how you write a datafield and we’ll start by closing the global panel. Don’t worry you can quickly come back to it later, it doesn’t close the document in any way but it does give us some more room to work with.
Short summary of the three steps:
- Whenever you are writing a datafield, you start by writing the concept which it provides some information about. This is essentially the context for the variable information. In our case, we are looking at the commencement-date of the agreement, so we will write #agreement.
- Then, we write the circumflex character to indicate to ClauseBase that we are transitioning from a concept to a datafield. If you need help on how to write this symbol, make sure to check out the bottom of the Grammar Sheet for more information.
- The actual title of the datafield. Do take into account that a space ends the datafield, so you will have to write a dash to indicate a space. In our case, that means
#agreement^commencement-date.
More info:
We start by removing the placeholder since we’ll be replacing it with a datafield, whenever you are writing a datafield you start by writing the concept which it provides some information about. This is essentially the context for that variable information. In our case we are looking at the commencement date of the agreement, so we will write the concept #agreement. A second element is that we write the circumflex character, the reason for that is that we need to indicate to ClauseBase that we’ve stopped writing a concept and we’re now actually beginning to write a datafield.
Finally, we of course indicate the title of the datafields. Do take into account that a space ends the datafields. So if I were to write commencement dates, then ClauseBase assumes that the datafield is called commencement but we can circumvent that by replacing the space with a dash and then ClauseBase recognizes that we’re writing the datafield commencement date.
If you don’t know where to locate that symbol on your keyboard you can also check out the grammar sheet (https://help.clausebase.com/kb/grammar-sheet/) which contains a link to some general information on how to find some of the more obscure symbols.

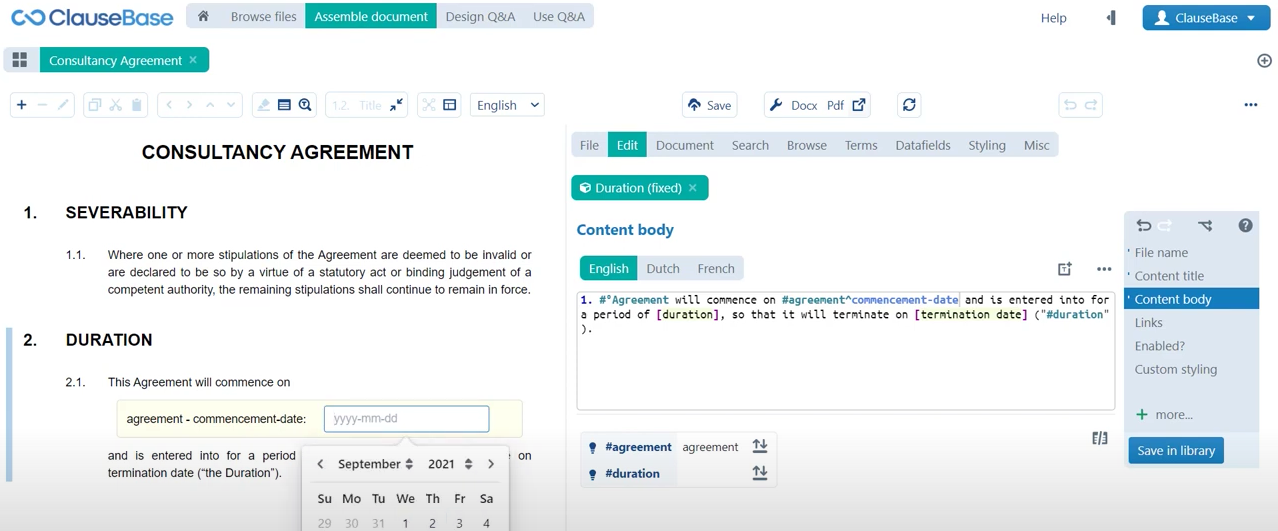
How to create a new datafield?
Much like concepts that were not previously created, ClauseBase will not recognize this datafields. So in order to add it to this agreement concept as you can see here, you simply click the error notification in red and then ClauseBase will ask you to indicate what kind of datafield that you’re interested in. Creating what sort of information needs to be filled out. A quick glance at the list of options leads us to the date datafields since we’re creating a commencement date. Then as you can see the datafield has been added, if I now click save in library, a yellow placeholder will appear in the interactive preview. Which allows me to open up a pop-up menu with a calendar where I can simply select a date.
Let’s repeat the exercise for the duration datafield just so that we can again take a look at how this works.
- First step is: you write the concept that will be providing context to the datafield.
- The second element is the circumflex character (^). In this case we’re looking for the duration of the agreement: again we’ll be writing #agreement^duration.
- The final element is the name of the datafield itself and then it’s just a matter of adding this datafield which is not yet been created to the concept. A quick look at the list of possible options leads us to conclude that we want the duration type datafields, if we then click save in library you can see that the same kind of yellow placeholder appears. Only this time we don’t have a calendar pop-up that we can fill out but we have a number that we can fill out let’s say something like 12. Then we can choose between years, months, days, weeks or quarters.
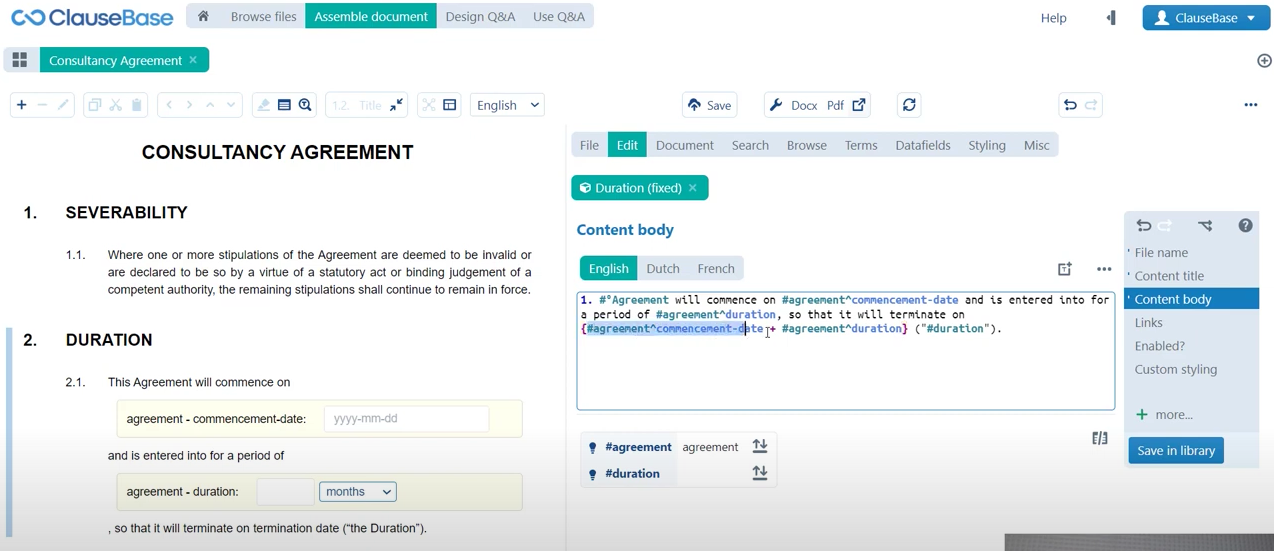
Calculating dates
For the final placeholder, it may be tempting to create simply yet another datafield. But if we take a step back then we actually realize that we can already sort of calculate this information. If we know what the commencement date of an agreement is and if we know how long the duration is, then we also know when it’s going to end. So you can instruct ClauseBase to automatically make these kinds of calculations for you. The way that you do that is fairly straightforward, you simply first of all remove the placeholder, then you start by writing the opening curly brackets and then within. You can also of course write the closing curly bracket already and then within these brackets you simply write the sum that needs to be made ie, hashtag agreement, commencement date plus hashtag agreement duration. So we’re just adding the commencement date and the agreement together to calculate the termination date.
If you now click save in library again to update the clause, you can see that it will display zero. But that is of course because we haven’t yet filled out any values here. We can either fill out these values in the interactive preview in the yellow placeholder boxes or we can also navigate to the datafields menu where we have an overview of all the datafields in the document and where we can also quickly select values for them.
So here in the commencement dates we can say that for example the 21st of September is our commencement date and it will then also be displayed in the interactive preview. Then we can also select a duration, let’s go with a duration of one year. Side note: the notation for your dates whether you prefer 21 September or September 21st are all things that you can organize centrally from a central styling menu. So we won’t be going into too much detail on this now but know that you can always amend this, if this is not your preferred date notation. Then of course you can see here that if we select the commencement date as being the 21st of September, if we select the duration as being one year then we can see that the termination date will effectively occur on one year later, on the 21st of September 2022. Now this sort of intelligence can of course be very useful to speed up the process of calculating certain terms, certain dates, sums of money, certain numbers, etc.
⏭ Next on we’ll find out how we can ramp up that intelligence to another level!
Do you want to learn more about this chapter? Check out our help page on introduction to datafields.