5. Conditional logic (I)
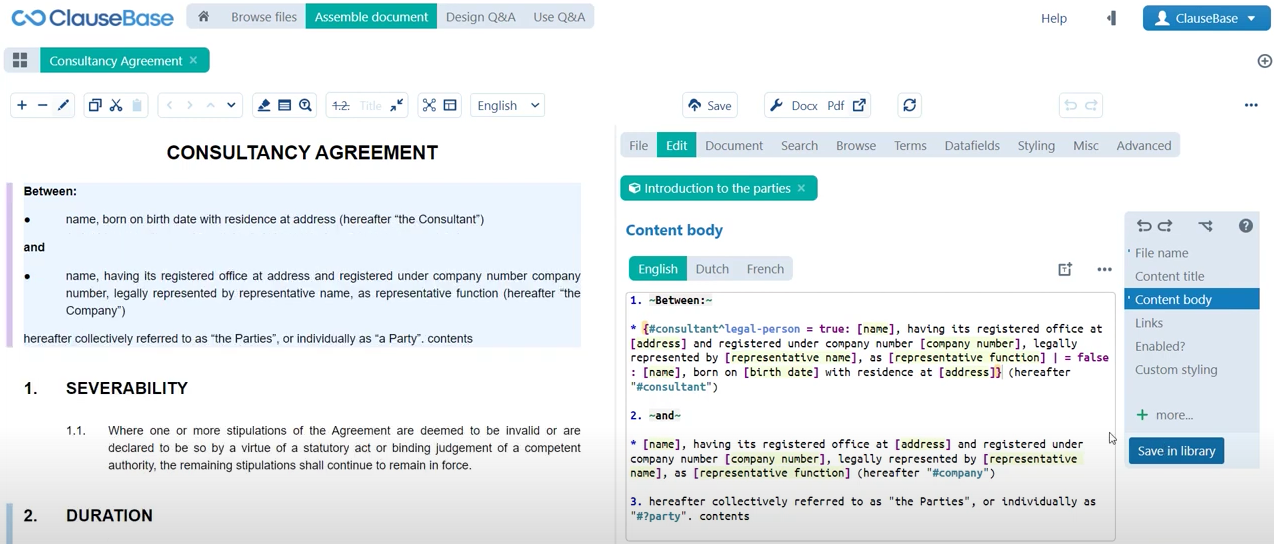
In the previous chapters we already successfully created a basic clause with some flexible terminology as well, as a little bit more advanced clauses. They already contain a little bit of variable information.

But for this new clause, let's take it up a notch by making large parts of the clause conditional, so that it can change its shape depending on the preferred legal nuance. A great example of a first clause where we can do that, is in the introduction to this consultancy agreement, the clause introducing the parties. As you can see here the template author has already indicated that certain text needs to be shown if the consultant is a legal person. Other text needs to be shown if the consultant is a natural person. That’s a prime example of legal nuance.
Create a new clause
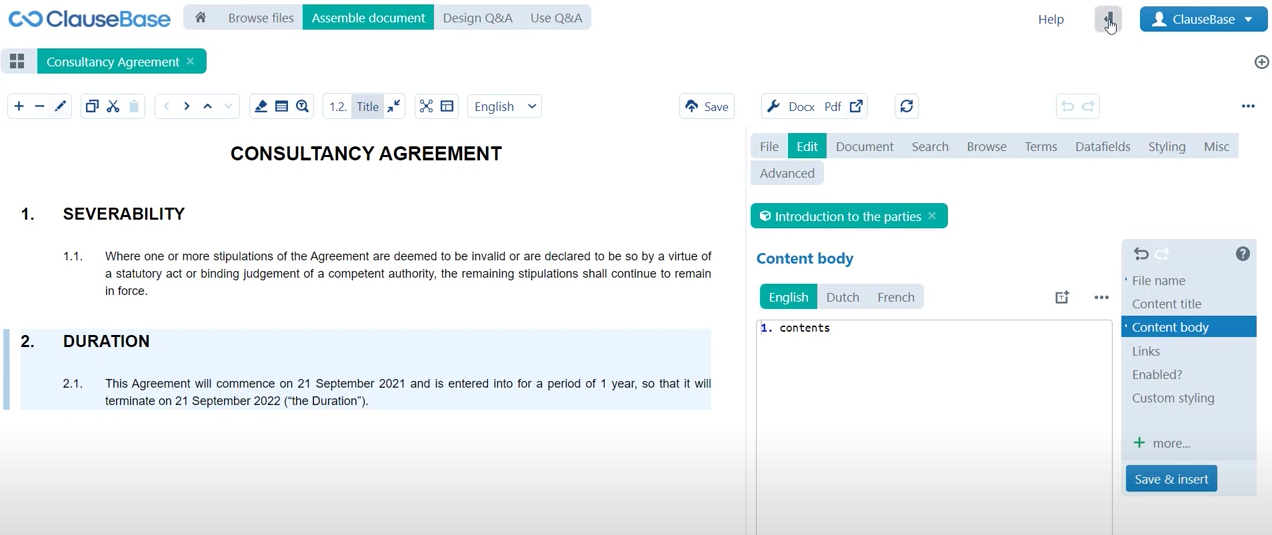
Let’s start by creating a new clause file, I’ll create a library clause. Obviously, You’ll need to create a new folder since we don’t really have anything that we can place this in. So we’ll create a new regular folder called introduction. We’ll indicate that we want to place this clause in the introduction folder and then of course the typical process of filling out file name, content title and content body. For file name we can choose something basic like “introduction to the parties”. Just so long as it’s clear what the content of this clause actually is.
- The file name is typically not all that important.
- The content title is of course blank because we don’t really have a title for this clause. In the source document, if there’s no real title that you can include here, then it’s perfectly okay to leave that blank.
- As for the content body we will simply import all of that from the global panel so I’ll open up the global panel.
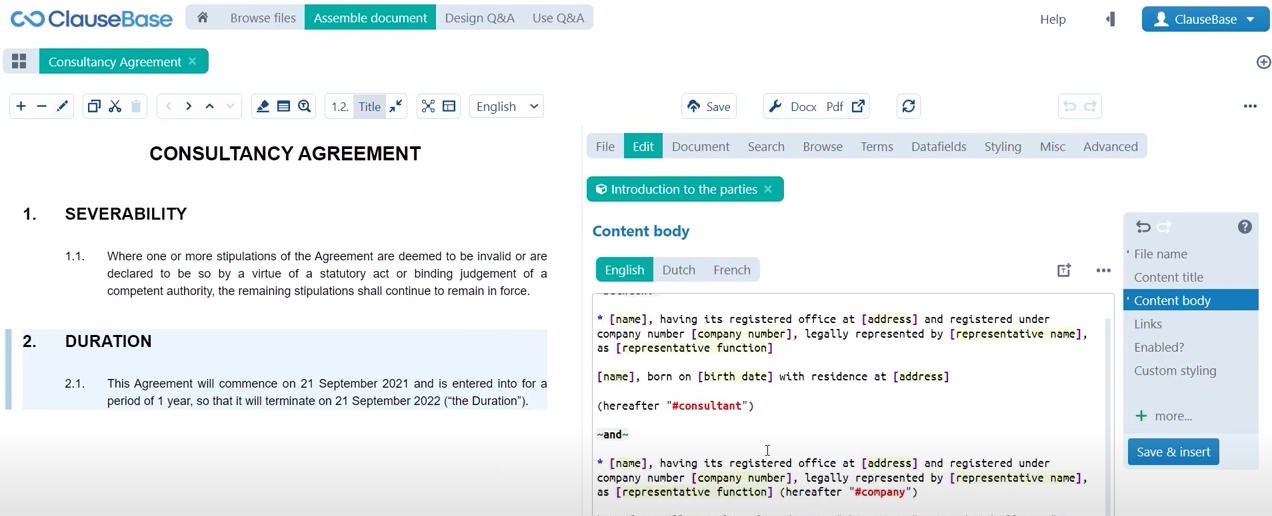
One of the things that you’ll notice right away is that the comments that were included by the template author have also been imported in ClauseBase. Naturally we don’t want to include these in the content body because we’re going to be creating conditional logic that allows us to switch between these two, so we don’t need to have this explanation. We can effectively disable them, we can effectively tell ClauseBase not to import these clauses by double-clicking this circle icon next to the comment and we’ll do the same for the second comment. Then ordinarily you would import the content by clicking the import icon.
Now there are quite a few different paragraphs here and they’re all set at the same level. An easier way to approach this would be to select all of this text from the introduction to the parties and then just click transfer selection. As you can see the text is immediately inserted, there is still a little bit of clean-up work that we have to do. For example, ClauseBase assumes that this company number needs to be a concept, which of course it doesn’t need to be. It’s just a hard-coded word company number. Same for this placeholder we can do that here as well, and then we can of course close the global panel, since we won’t really be needing it anymore for this clause. Then the only things that we still need to do in order to be able to save and create this clause, is to add these two concepts which ClauseBase does not yet recognize. Store these in your concepts folder and create the concept label company for the company. And do the same for the consultants. Now our clause can be saved and inserted.
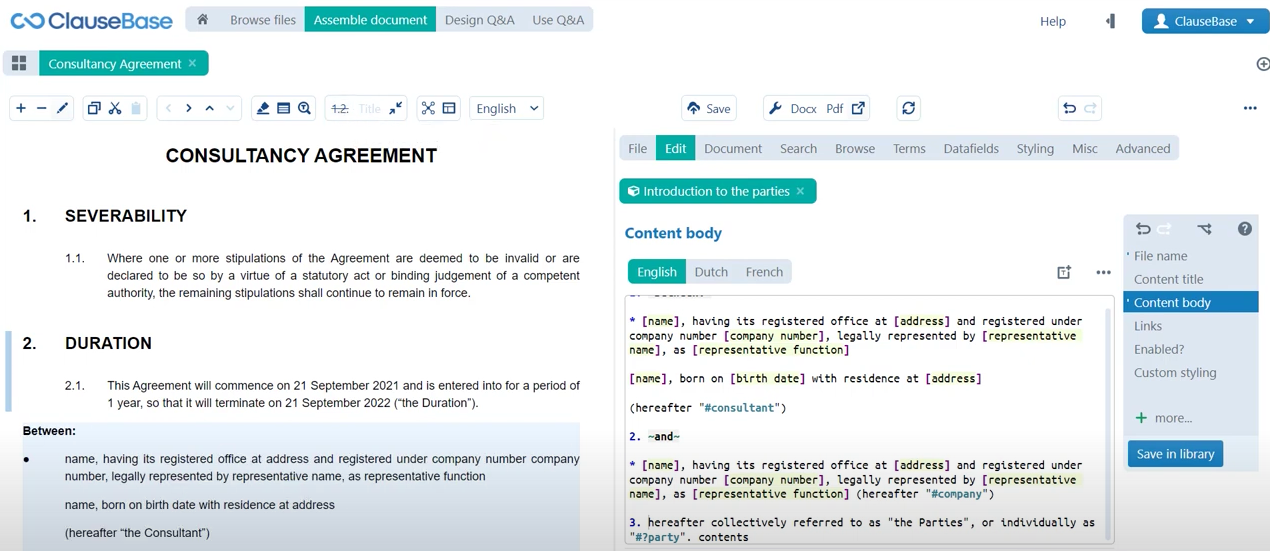
One of the things that you’ll notice right away is that ClauseBase did a few things right in terms of the structure. There are a few things that we still need to fix manually.
First of all ClauseBase correctly identified the fact that between and “and”, in this particular situation are bolded, so it has surrounded this text with tilts.
If you need some more information on how different symbols can affect different formatting changes to the text, make sure to check out the grammar sheet (https://help.clausebase.com/kb/grammar-sheet/) which contains an entry on that.
Paragraph Styling
- Bullets: The bullets are of course also correct, so ClauseBase correctly identified the fact that there are bullets in this clause and has changed them to ClauseBase bullets. Which you can just write with an asterisk symbol.
- Alignment: The alignment of the paragraphs is not yet correct so between and “and” hereafter collectively referred to as, should all be on the same level as you can see here in the source document. This is where the importance of paragraph numbering comes into play. Of course we’ve looked at that in the past we’ve seen that that plays a huge role in automatic numbering and allowing ClauseBase to construct a numbering and to change the numbering depending on how clauses are added to the documents.
- Numbering: Numbering plays an important role in styling, so depending on the identification of a certain piece of text as a paragraph, ClauseBase will apply different indentation, spacing, rules. Just everything that relates to how this paragraph conducts itself in relation to other. So what we’ll do is, we will add paragraphs to each entry here to indicate that they are in fact paragraphs and they should be treated in sort of the same way as one another. Then as you can see the alignment is now okay so they’re all aligned at the same level. Of course now numbering has been applied, not a problem we can toggle that numbering off by clicking this button in the document toolbar. Then we can also move this clause up by using the arrows icons in the document toolbar as well.
Conditionality
So with all of that out of the way it is now time to take a look at how we can make this introduction of the consultant conditional, so that we can with one click of a button indicate whether or not the consultant is a legal person and immediately affect the appropriate changes in the actual text of the clause.
So much as with the mathematical equations that we looked at the calculations, a condition starts with a curly bracket and then there is a three-part structure.
- First of all, you designate the part of the text where we are creating conditional text using these curly brackets.
- Then I essentially introduced a three-part structure to this condition.
Three-part structure: you ask the question, then you provide the answer and then the result of that answer.
1
The question
The first part of any condition is always a question and that’s typically portrayed as a datafield because again datafields are essentially just questions.
2
3
You know what is the name of the consultant? What is the commencement date of the agreement? Those are inherently questions and what I did here was I asked a yes or no question. If we take a look at this datafield that I just created for that purpose, we can see that the kind of datafield that I’m using here is the true or false datafield, which allows me to ask a question that can either be answered by yes or by no. So two options no more, perfect for this situation where we’re asking is the consultant the legal person, which is naturally always going to be yes or no. There’s no real in between, so true or false.
- That’s my first part of the condition, I’m asking the question is the consultant a legal person? The question/the condition starts with the question: is the consultant a legal person?
2
The answer
The second part of the condition allows us to submit a hypothetical answer to that question.
2
3
- It is true, the consultant is in fact a legal person.
- Then finally insert a colon : this indicate that we’re transferring to the third part of the condition.
3
The result
Indicate what the situation is if the hypothetical answer is correct and indicate what happens if that is not the case.
2
3
- Which is of course all of the text that needs to be shown, if indeed the consultant is a legal person. If that hypothetical answer is correct. Then of course we have indicated what the situation is if the consultant is indeed a legal person but we also need to indicate what happens if that is not the case. We can use this pipe symbol to bifurcate a condition and essentially allow ourselves to provide a different answer to the question, so we don’t need to repeat the entire first part.
Now we’ve come to a close as for this first situation where the consultant is a legal person and now we’re looking at a new second element to the condition, which is it’s not true but it is false, the consultant is a legal person. Then again the colon indicates that we’re moving on to the third part of the condition which in that case identifies all of this information for the consultant as a natural person.
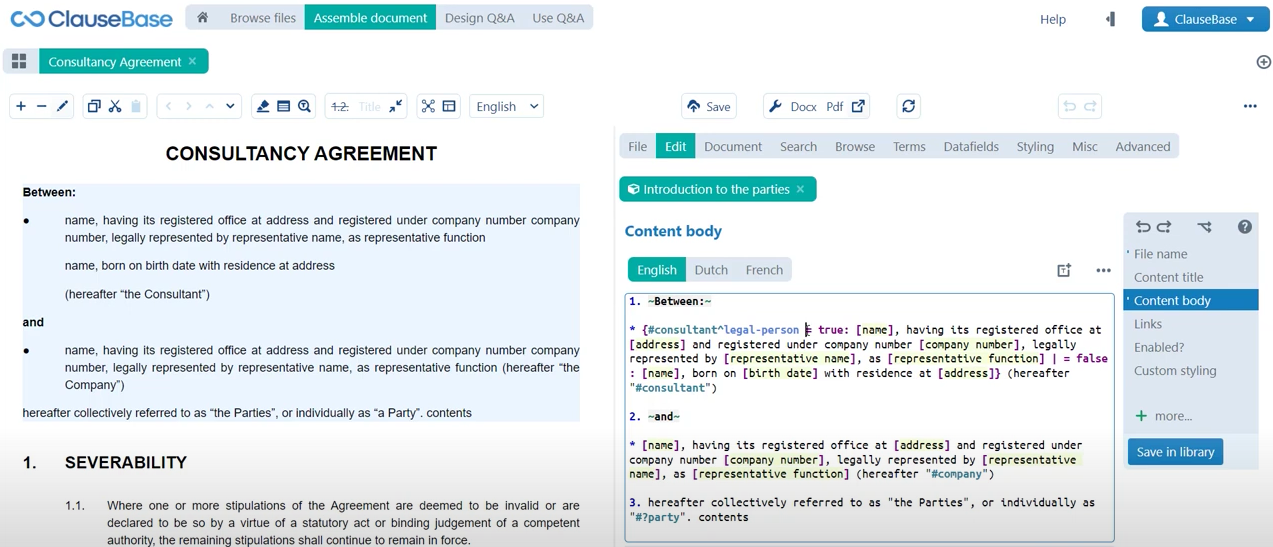
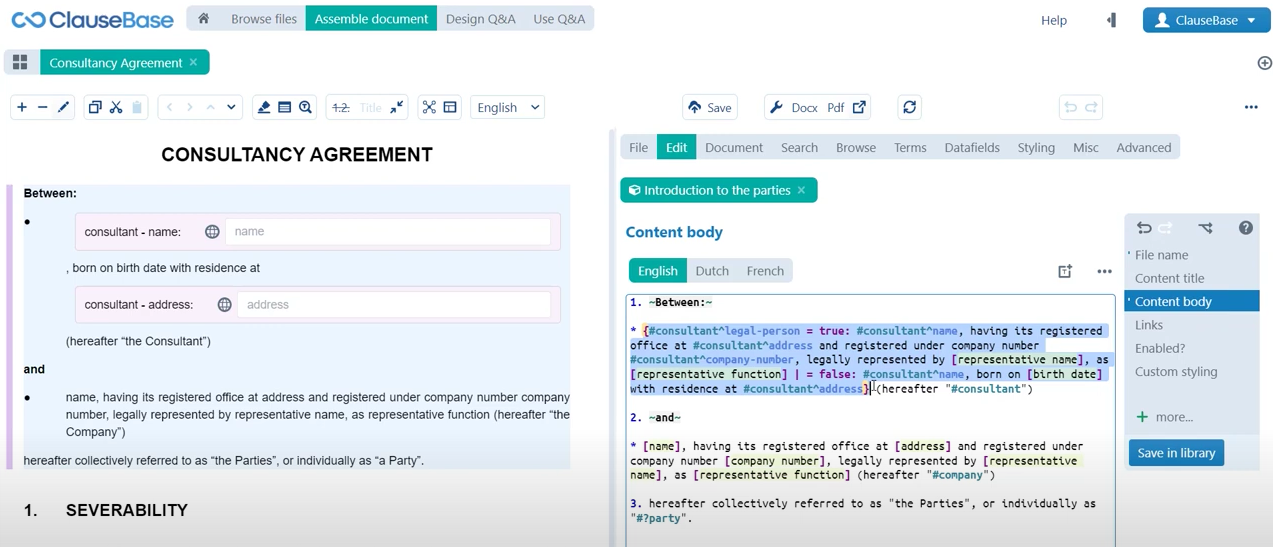
- Of course at the end of the condition, we just use the closing curly brackets to round all of that off and if I now click “save in library”. Watch what happens on the left-hand side. You can see that some of the text has disappeared and that a purple bar has appeared next to this clause. The purple bar indicates that conditional logic is present, so that there’s more than meets the eye with this clause and that you can jump into the datafields menu to play around with some of the datafields.
If I now click legal person, I indicate the fact that this datafield is true, then you can see that the legal person text is displayed. If I turn that off then you can see that the natural person text is displayed. If I don’t provide an answer at all by clicking this bin icon, then the default answer will always be false. So we need to actively indicate that something is true in order for that information to appear.
Create datafields
That essentially creates our condition, now of course there are still a few things that we need to do.
First of all we need to create datafields for all of these placeholders. Quickly create a few datafields, just so that you can get the feel of how to approach this. The way that we should do this should be clear by now, you can of course replace this placeholder by a datafield called for example consultant name, since of course we’re dealing with the name of the consultant. And that’s the typical structure of the data field which we discussed in a previously.
Of course, that will be a text datafield, this address will be consultant address and that will also be a text to data field. Finally, let’s maybe take a look at one interesting example of a of a datafield where you might be tempted to indicate that this is a number type datafield. Write consultant company number but you should remember that company numbers are typically large strings of digits, sometimes there’s punctuation marks in there as well, depending on your jurisdiction. So a company number is not this, is not a number like 12 or 5 are numbers, so you should indicate typically that this is a text datafield. Then of course you can create some more additional names and you can also just reuse these datafields that you have created.
Here for the situation where the consultant is a natural person will indicate the consultant’s name a datafield that we created previously, same for the consultant address. You just sort of create the rest of the list that way now. One final thing that we can add to this, is that you may be tempted to say that this potentially is a little bit hard to read or can definitely become hard to read once you start using a lot more different text or a lot more different conditions.
In order to introduce some legibility, you can also use placeholders to just indicate what sort of content needs to be included here. And then define at a later point in the clause where what that content actually is, in short, instead of including all of this text for the consultant as a legal person. What we could do is just cut it out of the clause and include a placeholder. In our case we could write something like @legal person, so that’s the structure of these placeholders, internal snippets as they are called.
In ClauseBase you first write an @-symbol and then in all uppercase letters, in all caps, you write the name of the placeholder. Then a little bit further down the clause, we can indicate that legal person equals and then all of this text. Then we can do the same for natural person, which is obviously going to be all of this text. Then we’ll include this placeholder called natural person, so that’s a useful way to introduce some legibility, especially with more complex or more lengthy conditions.
⏭ Next on we’re also going to be taking a look at how to create conditions for using different kinds of datafields. Other kinds of datafields that can also engender different kinds of interactions with your clause.
Do you want to learn more about this chapter? Check out our help page on writing conditions.