6. Binders
Our new and improved Consultancy Agreement is coming along quite nicely, but of course one of the key features of this new version is that it is two documents – the Consultancy Agreement and the Services Annex rolled up into one individual file.
❗️We have actually been treating these two documents more as separate entities and in this chapter we’re putting an end to that!
We are going to be combining these two documents in what is known as a binder in ClauseBase terms and that will allow us to reuse terminology, consistent styling, reuse data fields etc.
Creating a binder
In order to create a binder you can go to the “browse files” menu and create a new binder file.
💡But, an even easier way of doing it, is to hold down the shift key and then press the “+ icon” in the top right-hand corner in your document assembly menu and that will open up an empty binder, as opposed to an empty document.
You can see that here it says “new binder”. We have this new tab here for any documents that we’re going to be adding and the document menu is replaced with a binder menu in the operations toolbar. If we open this binder menu we can start adding some new documents.
Before we do that, it’s important to make sure that we’re working with the most up-to-date version of our Consultancy Agreement and our Services Annex.
What we’ll do is:
1️⃣ save this document
2️⃣ close the clauses currently opened in the edit menu by holding down the shift key and then closing one of the tabs – that will automatically close all of the tabs that have currently been saved and
3️⃣ close the services annex and close the clauses currently opened
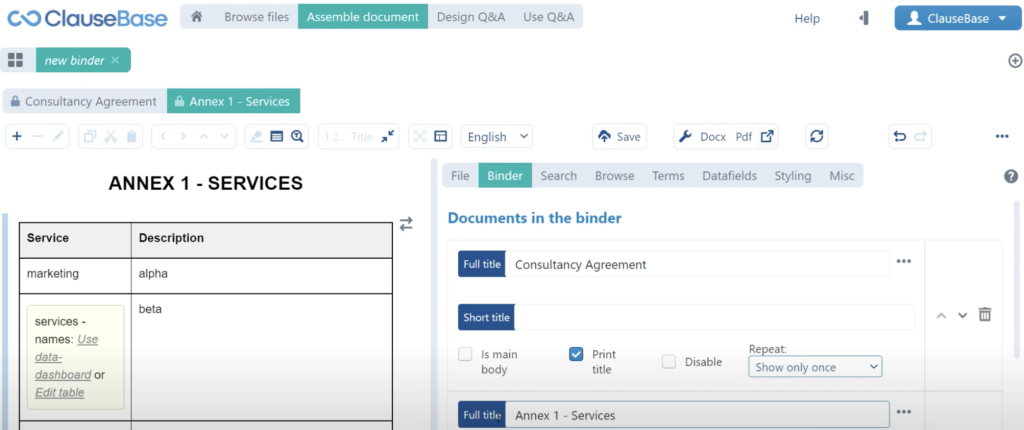
Now we can upload a new existing document, which is in first instance going to be our Consultancy Agreement. We can upload another existing document which is going to be our Services Annex and we haven’t actually provided a document title for this Services Annex. We can do that here Annex 1 – Services.
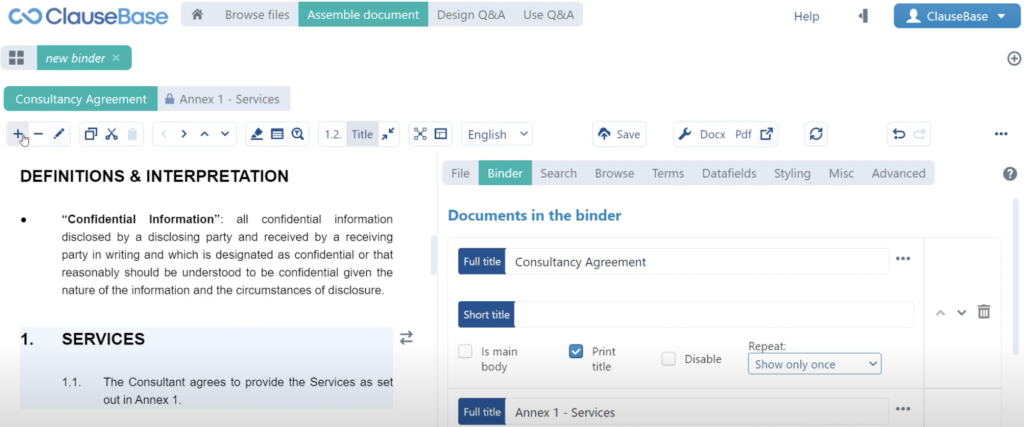
One of the first things you will notice is that you have these tabs now that allow you to switch between the different documents contained in the binder. But, you’ll also see that there is a padlock icon 🔒 attached to the binder.
The reason for that is the following – there exists a link between the individual source documents: the individual Consultancy Agreement, the individual Services Annex and the binder.
❗️Any change made to the individual document will be communicated to the binder but not vice versa. You can actually see that here – if we just select a random clause in this binder, you can see that we cannot add new clauses, we cannot remove this clause, we cannot change its location. We can’t really change the structure of the document.
The reason for that is if we were to make changes to the binder document then it would start leading a separate life from the individual source document which is why by default these documents are locked. If you want to make changes to the structure of the underlying document the rule is that nine out of ten times you’ll want to be able to do that from the individual source document. You can of course click that padlock icon to open this document up and as soon as we do that you can see that there are all of these options available to change the structure of the document. But as soon as you start making changes that way, you are going to be creating a copy, so this this binder document or this version of the document included in the binder is going to start looking different from the individual source document.
If all of that is confusing really the only thing that you need to remember is changes to the Consultancy Agreement are made in the individual Consultancy Agreement and not in the binder because those changes will be made from the individual document to the binder.
With all of that out of the way, we can also create this this file. We’ll call this a Consultancy Agreement + Annex just to differentiate it from the original Consultancy Agreement. We will display that as a binder and we will save that in the “my documents” folder. So, save that binder and then there’s only a few more things that we need to do.
Creating a cross-reference between documents
First of all we need to create a definition for the services which indicates that the services shall have the meaning set forth in Annex 1 and of course we need to create this cross-reference as well in this first article. We can navigate into that clause and we can actually make changes here in that clause because, remember, aside from the explanation that I just gave in relation to the individual document and the binder, clauses remain files unto themselves. So, clauses are fair game.
You can make any sort of changes in the library clause and it will immediately be reflected in all of the documents or binders or Q&A’s that make use of that clause.
It’s just the structure of the document, the existence of certain clauses, the removal of a certain clause, the location, all of that is padlocked in a binder. So here we can just create a cross reference as we would ordinarily. We will just create one with the help of a basic cross tag which we’re going to call “annex-services”. You can see that no annex-services tag has been found, and now you may be wondering “How do we create a cross reference to an Annex, how do we find the cross-tags menu for an individual document?” and the answer is fairly simple – if we navigate to the binder menu and scroll all the way down we can go into the “properties” of the individual documents contained in the binder or the binder itself in its entirety.
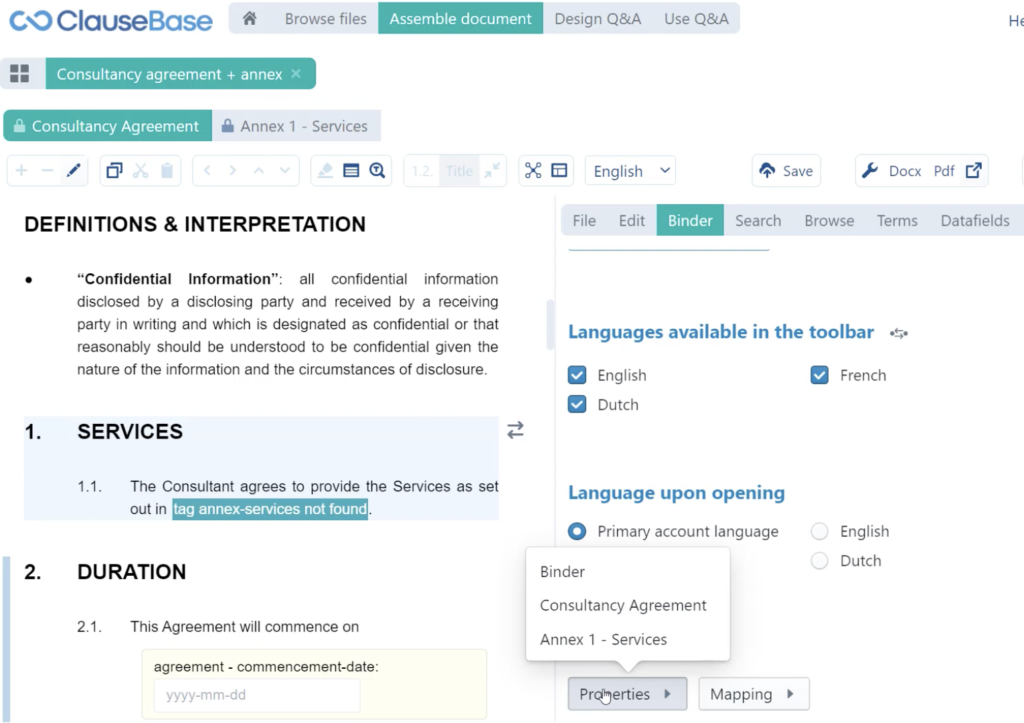
In this case, we’re opening up the properties of Annex 1, and you can see that it just opens that document up in the edit menu as you would ordinarily also do with clauses. For this document, you can see it’s differentiated from the other tab by virtue of its icon. You also have quite a few different options including also cross-tags. So we will add the cross-tag “annex-services” and then save that in the library, and immediately the cross-reference is made, but of course we in the source document are not referencing to Annex 1 – Services, we just want to refer to the shorter title of Annex 1. That’s why in the binder menu you can see that we have these full titles for the document which are displayed at the top, which essentially function as the document title in the document itself, but we also have these short titles so we can indicate that we would like to reference the document in the short version by filling out “Annex 1” and then that reference is correct.

We can do the same for the definition itself. So, if we go into the terms menu, we have no definition chosen yet for the services. We can create a new one in the library in which case we will drop this in the definitions folder, and there we will indicate as stated in the base document – shall have the meaning set forth in Annex 1 – so we’ll indicate the definition like so. Then immediately in the terms menu, we will be able to set up this new definition.
✅ That essentially concludes all of the things that we need to know about binders.
⏭ To complete the automation of this new version of the Consultancy Agreement in the next chapter, we’re going to take a look at how to make sure that the styling remains consistent across these documents and how some of the more advanced styling functionalities work.
For more information on some of the topics discussed in this video, make sure to check out: