7. Styling
In this chapter we are going to take a look at all of the new styling elements that have been introduced in this new version of the Consultancy Agreement and recreate them in ClauseBase.
As you can see from the new source document, this is quite a significant departure in terms of look and feel from the original Consultancy Agreement. Fortunately for us, the template author has indicated in the first comment in this document all of the different changes that need to occur to make sure that this document has the correct style applied to it and you can see that all of these categories involved relate to individual elements of the style that we can then also set up in ClauseBase. These follow essentially the same structure for the sub-elements of the styling settings in ClauseBase.
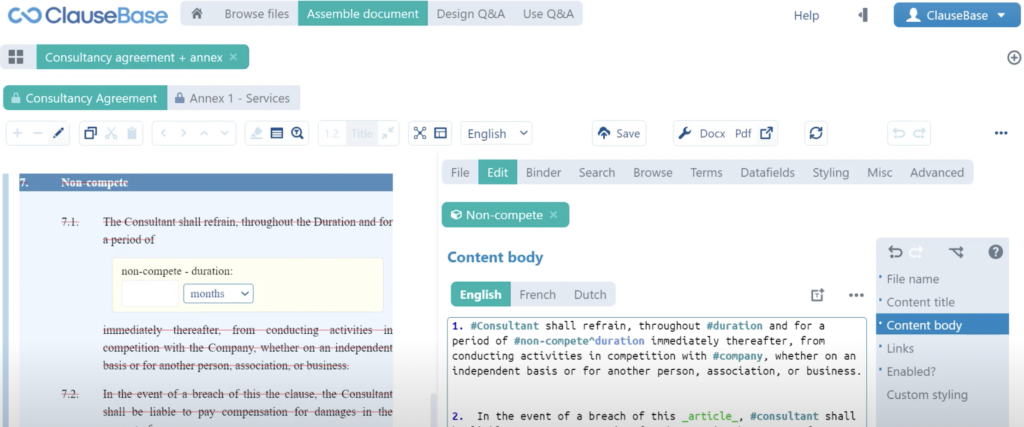
So without further ado, let’s jump into the styling menu in ClauseBase where you can also see that all of these sub-elements are present.
How to apply styling to binders?
Now, the first question that you might be asking yourself based on the previous chapter is “where do we apply this style, do we apply it at binder level or at the level of the individual sub-document?”. The short answer to that question is binder, the long answer is that ClauseBase essentially applies a kind of cascade system for using the correct styling elements.
1️⃣ At the first level, ClauseBase is going to check what sort of elements of the style have been decided upon at binder level, and everything that we’ve fine-tuned at binder level that’s applied.
2️⃣ Then it’s going to take a look of which elements of the style haven’t been fine-tuned in any way at the binder level, but have been fine-tuned at the level of an individual sub-document and it will apply those elements where the individual sub-document applies certain rules but the binder doesn’t say anything about that.
3️⃣ If in a third stage there are still certain elements of the style where neither the binder nor an individual sub documents has fine-tuned anything or has decided upon any sort of diverging styling settings, then ClauseBase will apply the default style which is either your organizations’ default style or, in case your organization hasn’t created the default style yet, it will just use the ClauseBase default style, which is of course what the Consultancy Agreement originally was created in. So, as you can see, ClauseBase tries to harmonize styling settings as much as possible across all of these different elements.
One notable exception to that is the page styling menu. We’ll take a look at that later on in the chapter. The reason for that is that page styling settings are intrinsically tied to the way that an individual sub-document is portrayed so you need to be able to have that flexibility to let individual sub-documents in a binder differentiate still from one another.
Base styling
With all that out of the way, we can now move on to the applying the appropriate settings and we’ll take another quick look at the base document where you can see that the base styling setting the first setting that we need to adjust is to put the font for this document on Times New Roman and the font size at 10. Let’s open up the “base styling” menu where you can see here that quite a few different styling options are available. The ones that we’re interested in relate to font. First of all, we are going to indicate that the font name is Times New Roman, the font size is set to 10, and then if we apply those changes across the document you can immediately see that both documents follow suit and immediately have that entire style applied to them. That’s essentially it for base styling. You can set up more styles and you can fine-tune that a little bit more, but that’s really all we need right now for this document. I should say that base styling also has an effect on other elements of the style because it provides a blueprint for which other styling elements can then follow. For example, the fact that we now set this font to Times New Roman will also indicate to the heading style and to the definition style for example to keep that into account and to follow what is decided upon in the base style.
Headings styling
Moving on to the headings style, let’s take another look at our source document. Here we need to give the titles of our clauses this kind of blue highlight color with white font color and also we need to set them to lower case cap style. You’ll remember from the original source document that all of the titles are displayed in all caps right now. We need to change that in the headings menu.
We can either adjust the styling per level or the scheme. The main difference there is here in the styling per level 90% of the way in which your headings are displayed are changed. In the scheme, however, we can also indicate how the number for a specific heading needs to be displayed.
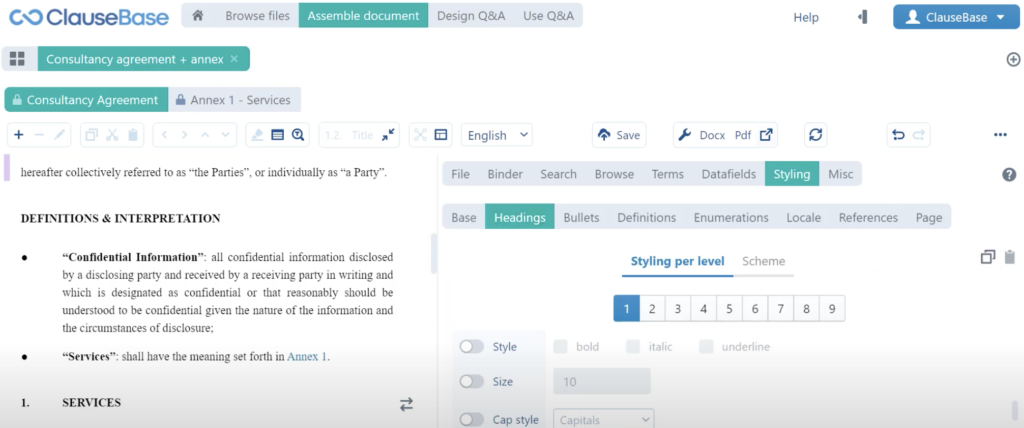
That’s primarily done here in the styling per level. Again, we can scroll down a little bit, we have alignment, paragraph, spacing… None of those are particularly interesting right now, but of course title font is. Now, you will also have noticed this sequence of numbers 1-9. That’s if you’re familiar with Microsoft Word essentially the same approach as Microsoft Word uses. You can define different styling settings for different heading levels appearing all the way down to level 9. Now, since we’re changing the way that the titles of our content titles looked, we are of course working with level 1 headings. So, you can also see that the title font has already been set to Times New Roman thanks to the base styling. The color will be set to white, the size is fine, the cap style again will be changed to regular instead of capitals and then if we scroll down a little bit more we find the “background of titles settings”. There we can indicate that we would like blue headings. There are quite a few different kinds of blue, the blue that we’re looking for here is steel blue but if you want to know 100% certainty which kind of colour you need, you can always click this icon and adjust the red green and blue values so that you can accurately recreate a certain colour in ClauseBase.
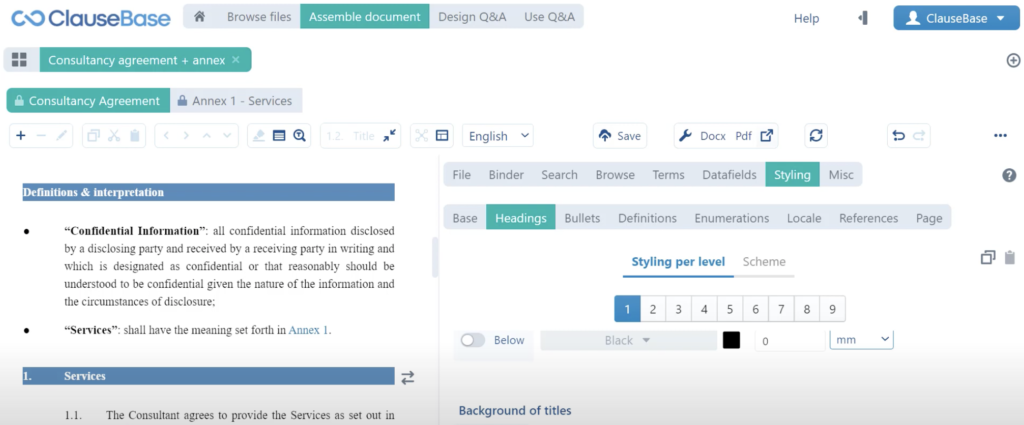
If we apply those changes immediately, you can see on the left-hand side that our document already resembles the source document a little bit more. Naturally, level 1 is not the only heading level that we need to be concerned with. Specifically, our level 2 heading included here, under the miscellaneous clause, also needs to be adjusted because it is still being portrayed in all caps. If we go into level 2 and then go back up to the cap style, we can adjust this to regular as well and then it follows the styling settings for our source.
Definition list styling
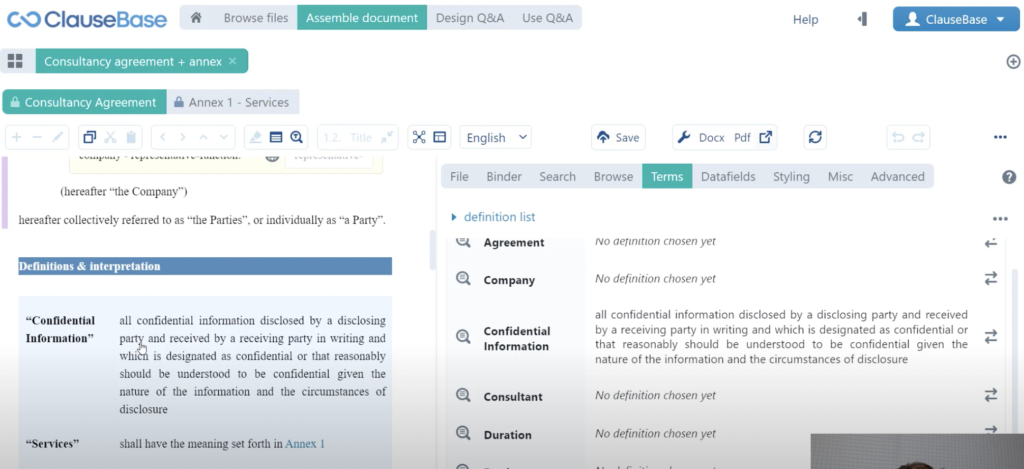
So, moving back into the document itself, we have taken care of these first three elements. Now we move on to definitions. Specifically, the template author is asking us to show definitions in a list-in-table format without borders and here some of the complexities of the relation of the individual sub-documents into the binder and the styling settings that belong to it is laid bare a little bit. If we scroll all the way back up, you can see that currently our definitions are portrayed as bullets. If we go into the definition styling settings, we can indicate that we would like to show the definitions not as bullets, but as table rows. That’s already one element of the new styling covered. Now the second element is that we also need to remove the borders in this style. As you will remember, the definition list is essentially an auto-generated ad-hoc clause that we can also fine tune a little bit as we can fine-tune any clause in in ClauseBase. However, since it is an ad hoc clause, it is intrinsically tied to the structure of the document. So, as opposed to library clauses, we cannot edit it in the binder. We know the rules when it comes to that, we can go back into our Consultancy Agreement, our individual source document, and there we can adjust the way in which the default the definition list is portrayed.
Now, you’ll immediately notice that this clause is wildly different from the clause in the binder and that’s because the binder shouldn’t diverge on structure and inclusion of certain clauses but it can have its own terms applied and its own definitions applied which is what we did. It can have its own styling settings applied as well, so that’s why we don’t have that second definition, that’s why this is still portrayed in bullets as opposed to table rows.
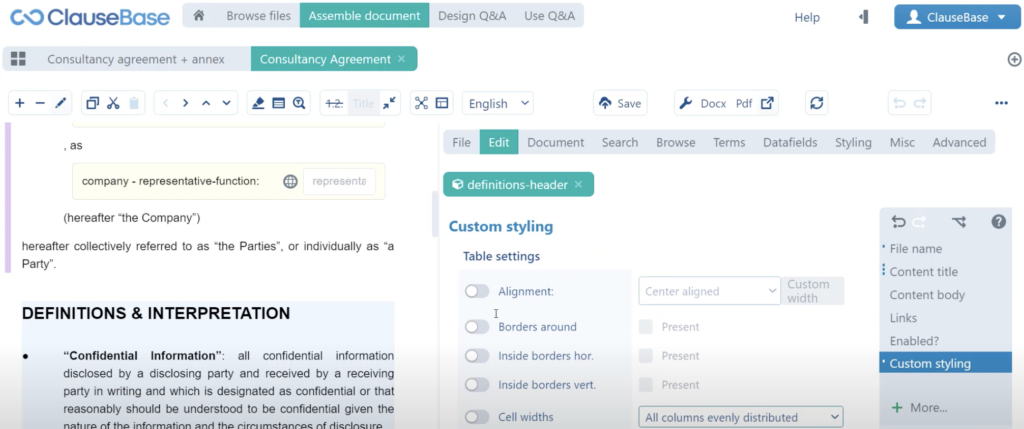
That said, we can still navigate into this ad-hoc clause by double clicking it. We can still go into the custom styling settings where for the body we can set up some custom styling settings in relation to the table. Now, there is no table appearing in this particular version of the clause, but of course in the binder there is a table appearing. So we can indicate that we would like to remove all of the borders – no borders around, no inside borders horizontally, no inside borders vertically, and if we update that clause now you can see that nothing changes in the actual clause. We can save this document and then close it down. As soon as we take a look at the definition list in the binder you can see that this setting has been applied, so a very good indication of changing the structure of a document from the individual source document rather than from the binder. Those two communicate, so any changes made to the definition list in the individual document immediately flows through to the binder. We have essentially completed what we needed to adjust for the styling settings when it comes to definitions.
References styling
We can jump back into our source document where we now move on to references. One of the things you will have noticed is that we are no longer using the word “article” when it comes to references to a particular clause. We are instead referencing the word “clause”. Again this is something that is fairly easy to be adjusted. We just go back into the styling menu, we go to the references menu where we can simply indicate what word we would like to use for a clause. Now we are using the singular version of “article” and the plural version of “articles”, but we can also use “clause” and “clauses” either with a capital “c” or with a lowercase “c”.

We’re doing the lowercase one here, and we will apply those changes. Immediately you can see here that if we go to the nearest cross-reference that it says notwithstanding clause 5.1 instead of article 5.1. That said, if we scroll down a little bit more you will see that we also used the hard-coded word “article”. Now, of course, this isn’t as much of an issue. We can refer to this as “article” or we can refer to this as “clause” but if you like to maintain that consistency then you can open up this document and you can essentially say you can essentially surround the word article with two underscores which will highlight this in green and indicate to ClauseBase – please change this word in accordance with the styling settings that have been applied in the reference level.
Then, you can see here, it will use the word “clause” but it will say this the clause because this tactic uses the same rules for creating the right articles as concepts do. So, we can drop the article “this” and instead write a degree symbol which we’ll change this to “in the event of a breach of this clause” just aligning that word with whatever word we’ve decided to use in the references styling level. That essentially sets up our styling for the references quite nicely.
Page number styling
Moving on to the final element – the page styling. We have some page numbers that are included in the main Consultancy Agreement which look like “page 1 of 4” and then in the Annex we have page numbers as well, but they use just the actual number of the page. So, those two are different from one another. Again, this is a good example of how page styling differs from one individual sub document to another. To cover this, we are not going to be using the styling in the binder. We are going to open up the individual documents in ClauseBase and we are going to navigate into the styling menu for those documents. If we now open up the default style for this Consultancy Agreement, we can again adjust quite a few different settings. The one that we need is the header and footer, specifically the right part of the footer. There we can include some new content. So, we are going to indicate that we want to adjust the right part and specifically, we want to fill out some content here. But ClauseBase also offers a few options for what you can include in this footer. The one that we need is the page number and then ClauseBase will construct the page number for you. What we will then do is choose “page number of” and then “total pages” which will allow us to recreate this style that you see right here – page 1 of 4.

Then, we can apply those changes. Now, headers and footers aren’t displayed in the interactive preview but that essentially covers it for this this Consultancy Agreement. We’ll save that document. We’ll do the same in the styling menu of the Services Annex where in the page menu we are scrolling down to the right part of the footer, only in this case we’re not using the page number of the total amount of pages, we’re just using the page number itself. Of course, we will indicate that we would like to start the page number at 1 and that it shouldn’t continue from the original document, or rather the Consultancy Agreement. If we apply those changes and then save the document, of course that means that this binder now also has something to fall back on in terms of page styling and that all the new elements of the styling have been introduced.
✅ That essentially covers it for the styling!
For more information on some of the topics discussed in this video, make sure to check out: