8. Q&A optimisation
We have now arrived at the final chapter in this tutorial series!
The only thing that’s left for us to do is to optimize the Q&A that we originally created based on the new content that we’ve been adding. To finalize this binder and make it ready to move on to that Q&A domain, there’s just a few more things that we need to do.
If you take a look at this Annex 1- Services, you can see that this alternative option is still included in the document whereas we should actually only be using this table.
Remember, removing a clause from a document is changing the structure and that is not something that we can do by default in the binder. We should be doing it from the individual sub-document where we can indicate we would like to remove this clause.
Save this document to communicate the update to the binder. That update is not going to show immediately, but if we quickly close and open the binder back up you can see that the alternative option is removed. Another thing that we can do is remove these data fields because they were just placeholders and we don’t really have any need for them anymore. So, we will save this document. We can close it and move to the design Q&A panel where we can indicate that we would like to edit the existing Consultancy Agreement Q&A. Of course, this Q&A is still built as a layer on top of the original Consultancy Agreement. We’ve been making some changes to that document so we’ll take need to take those into account but more importantly we created a binder specifically so that we could bring the two sub-documents together. Currently, our Q&A is still a layer on top of the individual Consultancy Agreement but we would like it to be a layer on top of the binder and that’s definitely possible.
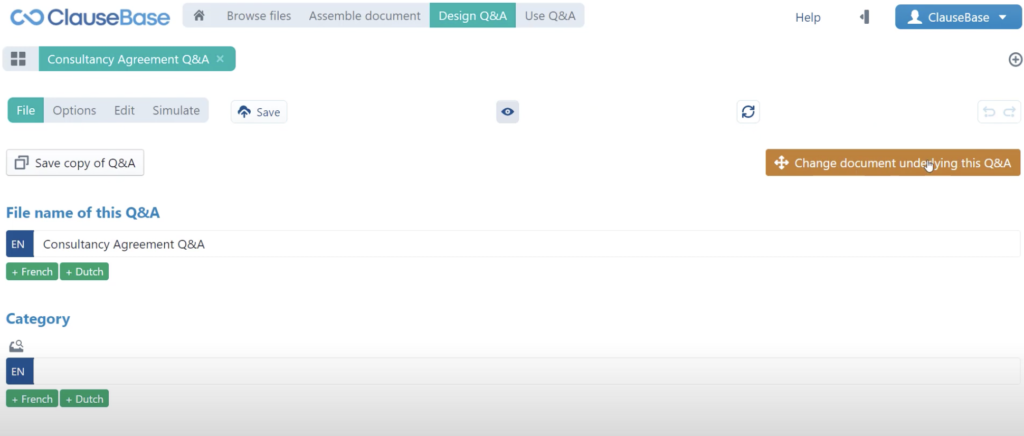
Adapting the Q&A to the binder
If we move to the file menu, we can indicate that we would like to change the document underlying this Q&A and if we click that, then we can indicate that we would like the binder to be the engine of this Q&A.
That will close the Q&A, but you can open it back up and if you go to the simulate menu, you can see that we now have the two binder documents at our disposal. If we scroll down a little bit, just move through the questions, you can see that basically all the data fields that we originally added are still there because we didn’t make any major changes except for the services list, because we are no longer setting out the list of services in clause 1, but rather we are setting that out in a repeating list table in the Services Annex. Not a problem, we can move to the edit menu where if we scroll all the way down, we can select this question related to this data field, and outright remove it from the Q&A. We can then add our repeating list data fields in relation to the names of the services and the descriptions, and your instinctive response for that would probably be to navigate to the batch create menu.
For repeating list data fields, you need to manually add the data fields to the list of questions, and not through the batch create!
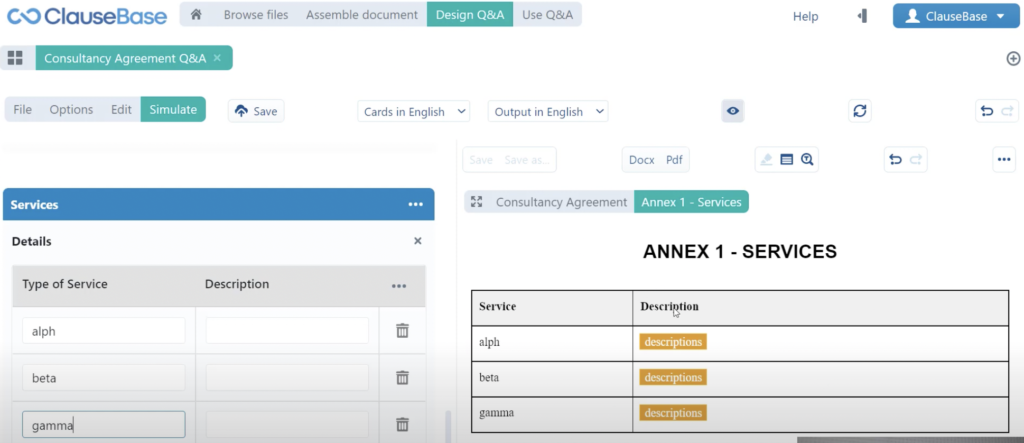
If we go back into the cards menu, you can create a new question which is going to act as a table. It’s that advanced nature of this repeating list data field that’s really prohibiting us from doing this via the batch create menu. But, of course, we can easily do it here manually. We will create a table, primarily because that is how repeating list data fields are pertaining Q&A. You can also see that this icon corresponds to the icon for repeating this data field, so we will move that question all the way to the top because it makes sense to ask that question first. Then, we will indicate that the title is details – the details were surrounding the services, and then we can create two new columns which correspond to the columns that we are using in the table.
Even if you wouldn’t use the table version, if you would use the clause version for setting out the services with repeating list data fields, you’re still going to have to create these table questions because that’s how repeating list data fields function in ClauseBase.
In the Q&A mode, you’re always going to have to set them out in a table format and you can then indicate a caption which is how the name of the data field differs from the way in which the question in Q&A is asked. Much like for example here, we also differentiated our question a little bit from the way that the data fields was phrased. So here we are going to indicate, for example, that the caption is the “type of service” and we are asking for the description of that service and that sets up our repeating list data field question.If we go intothe simulate menu, you can see that we can create all sorts of new options, for example alpha, beta, gamma (…) and those correspond to the columns in the table. That’s it for our repeating list data field.
That sets all of that up quite nicely. There are just a few more things that we then need to consider. If we quickly look back at the original source document, you can see that one of the first comments in the document says that we should be able to switch between the name of the consultant, so that whatever is filled out, and the term the consultant itself. Now, in the document assembly mode, you have the terms menu for that, and that’s actually fairly easy to accomplish. In Q&A mode, it’s a little more rigid, but you can still create that kind of flexibility even in the absence of a terms menu. If we go back into the questionnaire, we can go into the changes menu.
Replacing terms in clauses through Q&A
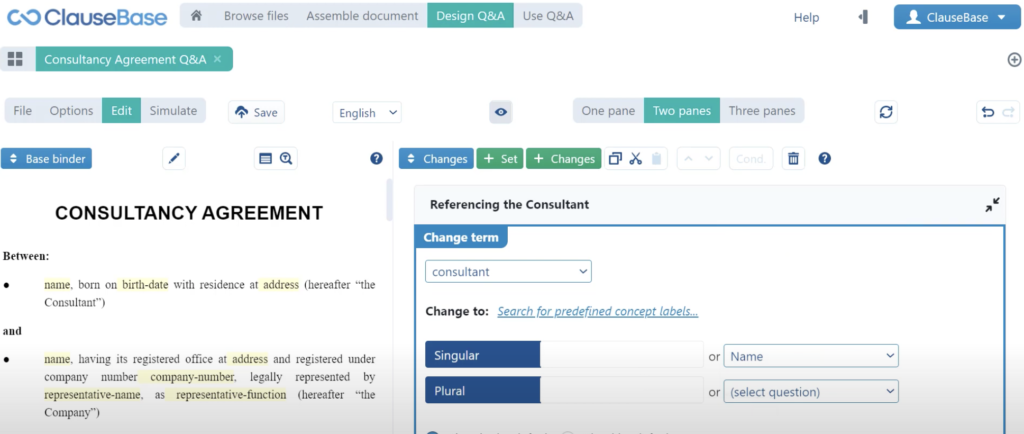
So we’ve been primarily working out of the cards pane and the batch create pane. Now we’re going into the changes pane because that allows us to set up quite a few more different subtle manipulations of the text. We’re going to create a new change set and we have all sorts of different types here that allow us to do all sorts of different stuff. The one that we need is the change term set because we’re going to change the term “the consultant” to something else. The title of that change set doesn’t really matter all that much. We’re just going to call it “referencing the consultant” just so that we can remember for ourselves what exactly this change set does. The term that we’re changing is the consultant and here we can set up how that term needs to be portrayed. You’ll remember this kind of setup from the concept labels overview.

Now, we can’t really fill out anything concrete because we don’t know what the name of the consultant is going to be. So, instead of filling out a value here, we are going to select a question that will contain the value that needs to be filled out. In our case that is the name of the consultant. Of course, the article needs to be dropped here in any case, because you’re never going to put an article in front of a person or a party’s name. This change set is essentially ready.
The only thing that is missing is an option to switch between the different kinds of options that are available, so either the consultant or the name. The user still needs to be able to switch between the two, and for that we are navigating back into the cards menu where we are explicitly going to ask by way of a final question in the consultant card a yes or no question from the user. This is going to be something along the lines of “reference the consultant by their name – yes or no” and depending on the answer to that question, our change set is either going to be activated or it is not going to be activated.
In order for us to make that sort of link between this question and the change set, we are just
1️⃣ navigating back into the changes menu
2️⃣ selecting this entire change set and then
3️⃣ adding a condition to it following the same condition builder that we’ve used previously
Specifically, we are going to indicate that the answer to the question reference the consultant by their name must be equal to true in order for us to actually activate this change set. If we now go into the simulate menuand we scroll all the way up, we indicate that the consultant is not a legal person and their name is John, then by default it’s going to say John and then reference the consultant. But, we can indicate that we would like to reference the consultant by their name, in which case all across the document the reference will be made to John as opposed to the consultant. Of course, if we say no, then the reference is still going to be the consultant. That’s basically that, so that sets up our first change quite nicely.
Creating conditions in Q&A
We’re going to look at another change very quickly, something a little bit more advanced. It’s this comment in the source documents, where the template author is indicating that we need to have multiple plans, where depending on which plan is chosen – the values filled out for amount and for hours should be differentiated. So, we are again going to navigate into our cards menu in the Q&A and under services we are going to create a new question below the repeating list data field question that we just created. We are going to make our three plans available, so we are going to create a text-based question because we need to be able to offer three different options. Then, we are going to call this remuneration fees plan, and we are going to create three different predefines – plan A, plan B and plan C. Of course, this question is going to be attached to another change set.
If we go back into our changes menu, we can create a new change set which allows us to change the value in a data field. Specifically, we’re going to create a plan change set which is going to change the value for services hours-per-month or monthly remuneration. Let’s start with that one because that’s the order the source document. If we take a quick look at that, you can see it starts with the monthly remuneration and the hours invested, so the monthly remuneration needs to be adjusted to a fixed value. Again, if we take another look at the source document, it is set at 5 000 euros, so we will select 5000 and them add another change to this – a data field change, which is going to set us up for hours per month and that is going to be a fixed value of 40 hours. These are the data field values for our plan A. Now again, we just need to create a condition that allows us to activate or deactivate plan A. Select the condition and we are again going to go through the creation wizard. The answer to the question “fees plan” needs to be equal to plan a. Then we can also create a change set for plan B.
Instead of manually recreating all of that, we are just going to copy this plan A, paste it and then re-arrange some of the configurations.
So, this is going to be plan B the value is 2800 and 20 and then, of course, the condition needs to be adjusted as well.
We’re not going to select plan A, but plan B, and then finally you would think that we could also create one for plan C, but the entire purpose of plan C is to allow the user to decide freely. So, we’re not going to create a change set for that, because we’re not going to fill out any sort of value. Instead, we are navigating into the cards pane again and then we are going to indicate that these questions – monthly remuneration and hours dedicated per month – are only going to be visible in case plan C was selected is equal to plan C. Then, we just copy that condition and paste it into this second question and one more final optimization that we can do is indicate this fees plan question. We can open up the options menu and we can indicate that no free answers are allowed which will allow us to control all of the different options available from this question. As you can see, if we now navigate into the simulate menu, we can select plan A which is automatically going to set us up with 5000 euros 40 hours, plan B which is going to set us up with 2800 and 20 hours and plan C which will allow us to fill out a value of our choice.
✅ So that’s a short look into the different options when it comes to change sets and that also concludes this tutorial series!
For more information on some of the topics discussed in this video, make sure to check out: