Fine-tuning the document
Now that the right clauses have been found and implemented, it is time for stage three of the document assembly process: fine-tuning.
There are two kinds of fine-tuning we can do:
- Engaging with the intelligence embedded in the clauses; and
- Adjusting the overall look and feel of the contract, including the numbering, headings and styling.
Let’s look at these in turn.
Part 4: Engaging with the intelligence embedded in clauses
Datafields
By now, you have already seen the yellow boxes on the left-hand side of your screen that function as easy ways to insert certain straightforward information like the name, address, and company number of a party. There is, however, more intelligence included in these clauses than you can see in the document preview.
Make sure to deselect any clause you may have selected by clicking on the empty space next to or above/below a clause, then navigate to the Datafields tab of the operations panel.
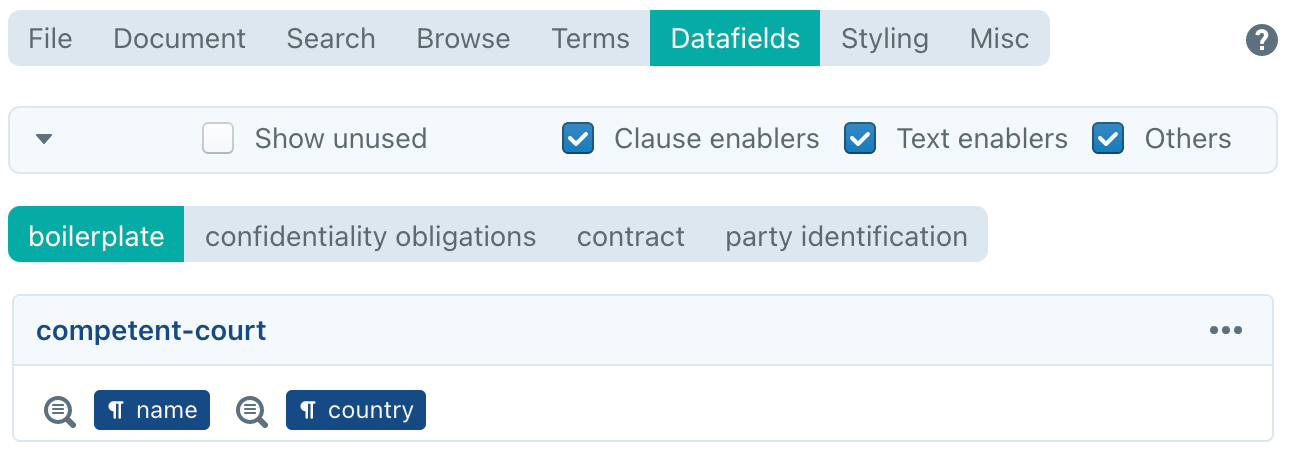
Within this screen, you have a complete overview of all the ways in which the content of the clauses can be adjusted to suit your needs, from basic information like party names, addresses and company numbers to legal nuances like whether or not the agreement should favour a specific party.
The categories of datafields (in this screen: boilerplate, confidential information, contract and party identification) are pre-created by your organisation’s clause authors and allow you to quickly find the datafield you are looking for. They also follow the language of the document.
Let’s start by navigating to the “contract” category within the datafields panel.
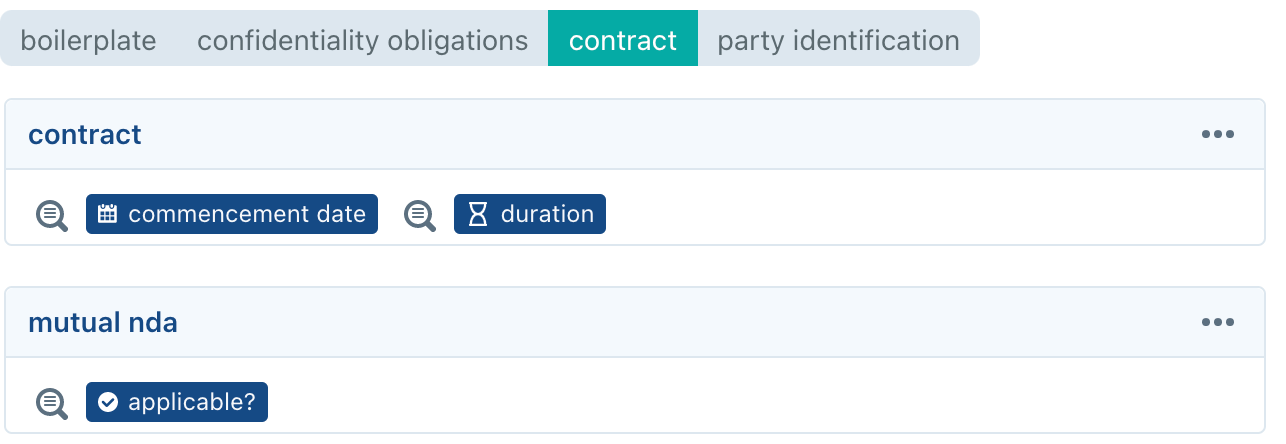
There are three datafields in this category than can be adjusted here:
- the commencement date of the contract;
- the duration of the contract; and
- whether or not the NDA in question should be mutual or unilateral.
If you click ![]() , you will see a bar pop up that shows you a date. The date that pops up will always be the current date, but you can pick a new one from the calendar that appears when you click this date.
, you will see a bar pop up that shows you a date. The date that pops up will always be the current date, but you can pick a new one from the calendar that appears when you click this date.
The question you might now ask yourself is: “where can I see the changes that this information makes in the document?”. Click the ![]() icon to the left of
icon to the left of ![]() and you will see an overview of all clauses where this information is used. Clicking on the title in bold (commencement date + duration + termination by written notice + survival (7.)) will immediately take you to that clause in the document.
and you will see an overview of all clauses where this information is used. Clicking on the title in bold (commencement date + duration + termination by written notice + survival (7.)) will immediately take you to that clause in the document.
Datafields like this one — which contain dates, durations, text, numbers, etc. — are straightforward and can also be filled out by using the yellow boxes on the left-hand side of your screen. Where it gets interesting is with the aforementioned “true-or-false” datafields, which allow you to make a choice between two different ways a clause or text within a clause can appear. One example of such a true-or-false datafield within this contract is the “applicable” datafield under “mutual nda”. Try clicking it now.

Toggling the blue check-mark will yield changes across the entire document to make it mutual or unilateral. If you click the ![]() icon, you will also see that a large number of clauses in the contract use this datafield to a certain extent.
icon, you will also see that a large number of clauses in the contract use this datafield to a certain extent.
Up until this point, you have been looking at the datafields scattered across the entire contract. It is also possible to look at individual clauses and see how they are affected by certain datafields. Let’s look at the example of the assignment clause you inserted under the boilerplate provisions. Select it now and navigate to the datafields tab under the operations panel.
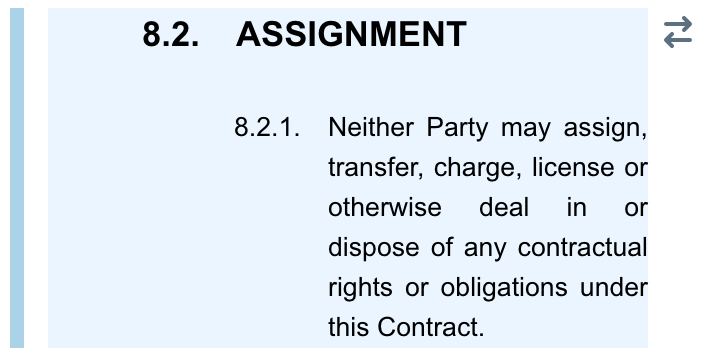
You will see that this clause is affected by only one datafield:

This is a true-or-false datafield that decides whether or not assignment should be allowed under this agreement. While this is the only clause that uses this datafield, it could be important when used in a document that contains several clauses on assignment to avoid contradictions.
If you activate this datafield you will notice that the assignment clause is now struck through:
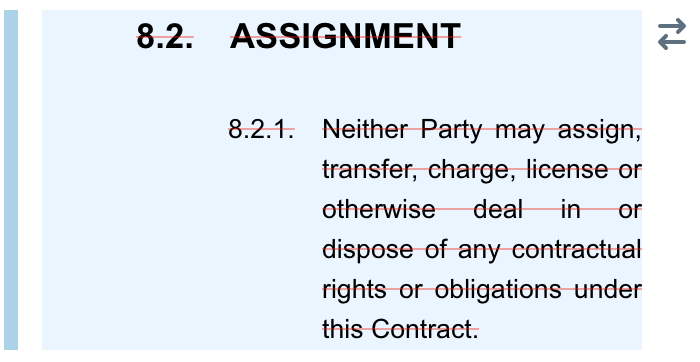
This means that the clause is disabled, because the conditions for it being shown (in this case: that assignment should be allowed) are not met. An alternative clause is available, though, as can be seen from the ![]() icon next to the clause. When you insert this alternative clause, you will see that it is not disabled, because the condition for it to be shown is that assignment should be allowed.
icon next to the clause. When you insert this alternative clause, you will see that it is not disabled, because the condition for it to be shown is that assignment should be allowed.
You can optionally choose to hide all disabled clauses by navigating to the  icon in the document toolbar and clicking “invisible clauses”.
Another interesting clause to try the above exercise with is the clause introducing the parties at the top of your document. If you select this clause, you will see that under the category “party identification”, there is the option to toggle the counterparty’s (called “Party 2”) status as a natural or legal person (see  ). If you toggle this on or off, you will see that certain datafields disappear or appear. This is because, for example, a company number no longer needs to be filled out when you’ve already designated that the party is not a company.
In conclusion, datafields carry three different kinds of effects:
- enabling or disabling a clause
- enabling or disabling text within a clause
- filling out variable information such as names, dates, durations, numbers, etc.
If at any time you want to have a clearer view of the different kinds of datafields present in a contract or a clause, you can toggle between them by checking or unchecking the respective check-box under your operations panel and above the categories overview:

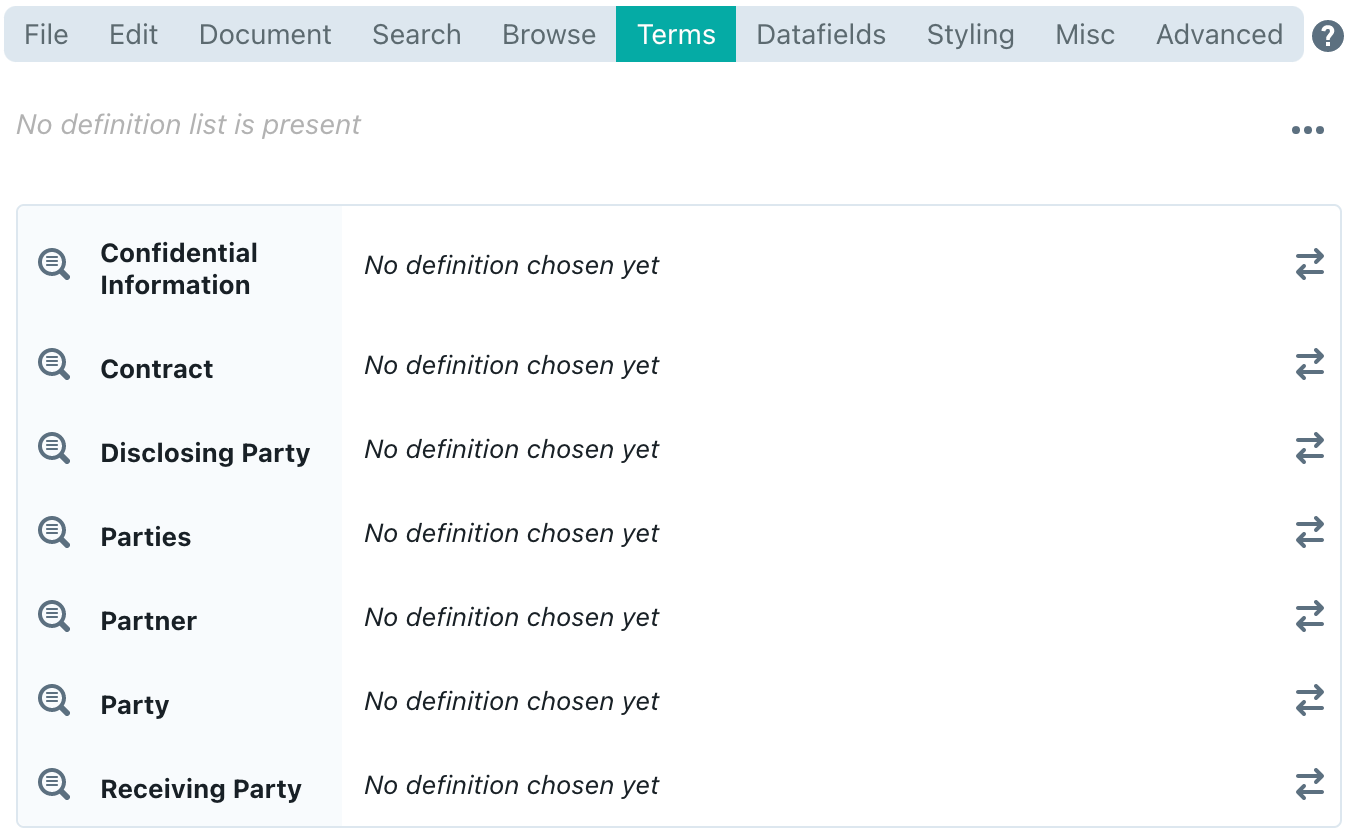
Terms
ClauseBase automatically drafts an overview of all capitalised concepts that need a definition or receive one in the text (provided your organisation’s clause authors have added this intelligence to your clauses). With this overview, you can grant definitions to the concepts in question, change their terminology and find out where they are used in the document.
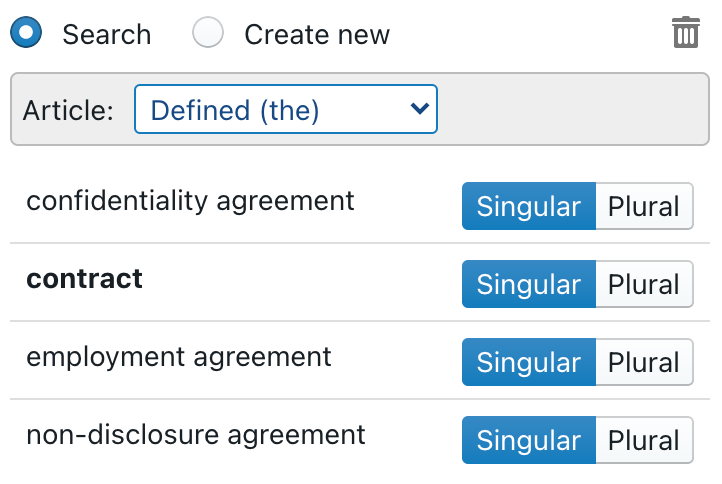
To grant a definition, simply click the ![]() icon and choose from a pre-defined list of definitions. If there is no such definition, simply click “create new” to create one on the spot.
icon and choose from a pre-defined list of definitions. If there is no such definition, simply click “create new” to create one on the spot.
Try selecting an available definition for each term. For terms like “Party” and “Parties”, no definition is needed, as these terms are already defined in the clause introducing the parties. For those terms (and “Disclosing Party” and “Receiving Party”, which you will also see if you toggled off the mutual nature of the NDA), select the  icon and click . When you’re done selecting definitions under the terms tab, select the
 ![]() icon at the top left-hand side of the document toolbar and choose Definition list in the dropdown menu. An automatically generated definition list will now be inserted as a new clause. Go ahead and adjust the location of the definition list, using the arrows in the document toolbar, to position it right after the recitals.
icon at the top left-hand side of the document toolbar and choose Definition list in the dropdown menu. An automatically generated definition list will now be inserted as a new clause. Go ahead and adjust the location of the definition list, using the arrows in the document toolbar, to position it right after the recitals.
To change the terminology of a concept, click the concept in question and either choose a new term from a pre-defined list or create a new term on the spot. Try doing this for “Contract” and you will see the following pop-up appear:
You can choose a new term by clicking either the singular or plural (depending on your preference) buttons and the term will be displayed in singular or plural. ClauseBase automatically makes all necessary grammatical adjustments (provided your organisation’s clause authors implemented this feature). Alternatively, you can click “create new” to create a new term.
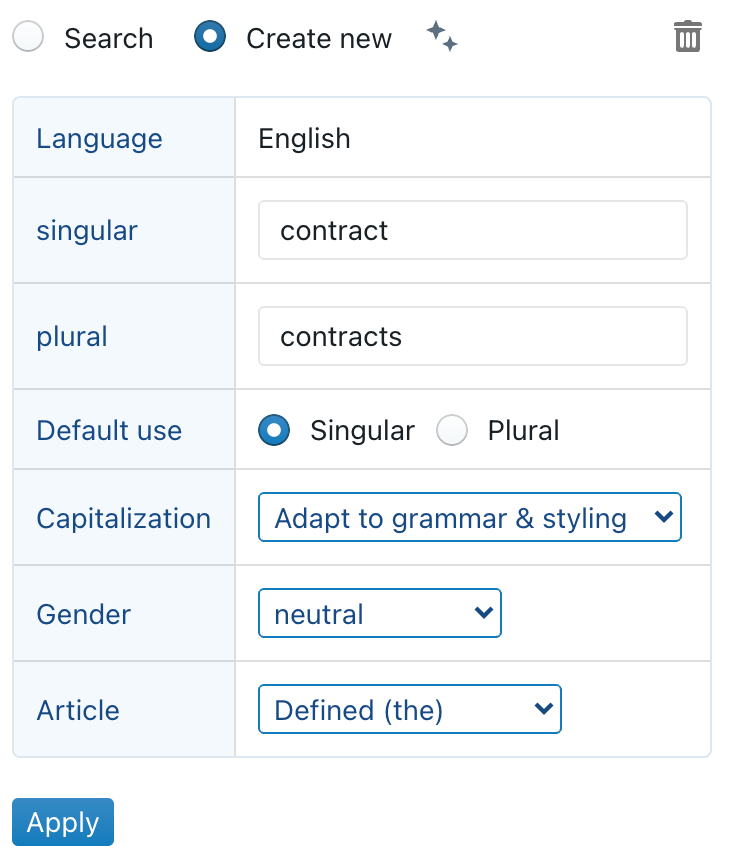
Under this menu, you can then fill out the specifics of the term as shown above and click “apply” to create the new term.
Finally, to see where a term is used in the contract, press the ![]() icon next to an individual term to be granted an overview similar to the one granted for datafields.
icon next to an individual term to be granted an overview similar to the one granted for datafields.