Simulating and polishing up the document
Simulating the document
It is good practice to simulate your document from time to time throughout its creation to make sure that you’re not missing anything important like:
- datafields that should disappear on the (non-)fulfilment of certain conditions
- layout of cards and questions
- to see if everything works as you intended it to
- whether the business users who will use this document understand the questions being asked of them
- etc…
To do so, go to the Simulation Context by clicking Simulate at the top left-hand side of the screen.
Excluding the top bar, this screen is what your business users will see when they start working with your questionnaire. (However, they will only see yellow boxes at the right side, instead of the brownish-colored boxes that may appear in the Simulate mode, as is the case on the screenshot below. Such brownish color indicates that the placeholder in question is not yet attached to a question — which is a hint towards you that you may need to create additional questions.)
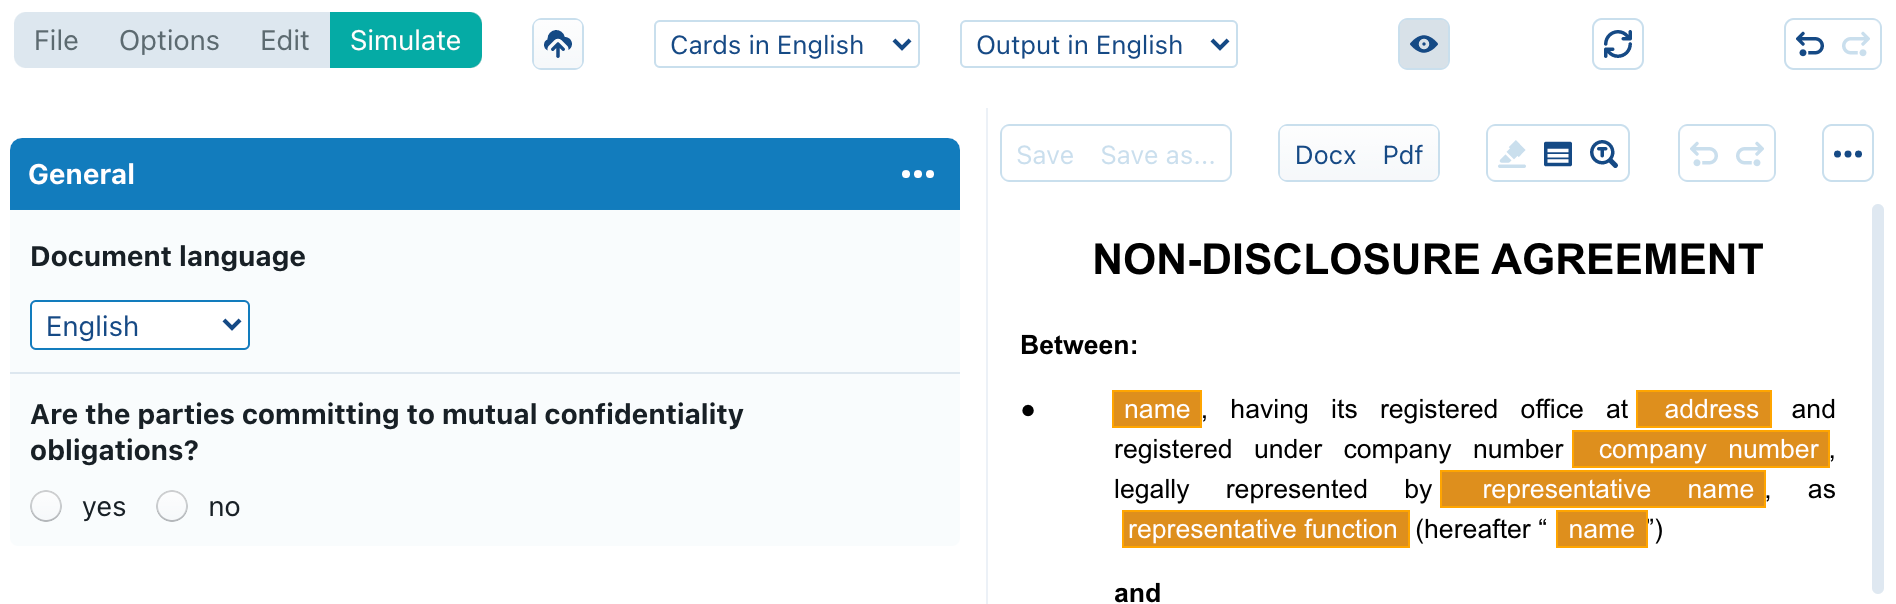
Feel free to play around with the different effects on the text that filling out the questions bring. For example, if you change the answer to the question “Are the parties engaging in mutual confidentiality obligations?”, you will see that, depending on your response, entire fragments of text can be altered. Notice the  icon next to the “name” and “company number” questions for each party. ClauseBase features an integration with virtually every national company register in the world. Clicking this icon allows you to perform a query in such a national company register. Do note, however, that your clause authors must enable this.
Simulation overview
The yellow placeholders for datafields used in the text act as hyperlinks that will direct you to the question that deals with them. If you click a placeholder and are not brought to a corresponding question on the left-hand side of the screen, then that means that either:
- no question has been provided for that datafield; or
- that question is hidden behind the fulfilment of a certain condition (obviously, it should never be the case that a datafield is visible in the preview, but the corresponding question isn’t available in the list of questions).
Conversely, if you click a question title, you will be transported on the right-hand side of the screen to the location of the corresponding datafield within the document. Do take note that for datafields that get used multiple times in the text (e.g.: “party1 – representative name”), you will only be transported to the first appearance of that datafield within the document.
Scrolling through the simulated preview, we can see a few points we would want to correct:
- the answer to the question “is the party a natural person?” will most likely be “no”, so you might consider setting “no” as your standard answer and allow the user to change it if necessary
- the answer to the question “nature of the relationship between the parties” requires you to look at how the datafield is included in the text in order to phrase your response in the right way; you could help your users in this regard by providing some help text
- your users might not know what is traditionally accepted as the duration of a confidentiality agreement so you could give some options to choose from
- the same goes for the survival duration of the confidentiality obligations
- the predefined options under “Country of the competent court” could be cleaned up a little
Let’s navigate back to the Editing Context to deal with some of these issues.
- Go to the question “is the party a natural person?”, click “add predefined answers” and then click the empty circle next to “no” (
 ). Checking this circle tells ClauseBase to treat “no” as the standard response. Users can still change this to “yes” if they choose, but if they don’t make an active choice “no” will be the standard response.
 - Go to the question “nature of the relationship between the parties”, click
 in the pane toolbar then type the following message in the answer box next to “help text”: “Please phrase your answer to fit in the following sentence: “Parties have entered into, or will enter into, a commercial relationship with respect to [….]”. If you go back to the Simulation Context, you will see a question mark is now shown next to the question itself. Hovering your mouse over it will show the help text.
 - Go to the question “duration”, click “add predefined answers”, then type “1” in the answer box and select “years” from the drop-down next to it. Click the
 icon to add a new option. Repeat this exercise for an option of “3”-years and “5”-years. If you want these three options to be the only ones available, click
  while still having the question selected and then check
  . This will prevent your users from choosing anything other than 1, 3 or 5 years as the answer to this question.
 - Repeat the above exercise for the question “survival duration of the confidentiality obligations after termination of the contract”.
- Go to the question “Country of the competent court”. Here, you want to keep the predefined options the same (since they are responsible for changing certain fragments of text and messing with their notation might cause problems there). What you can instead do is grant a label to each answer that will be presented to the user without changing the underlying answer, almost like an additional layer. Click the
 button next to each predefined answer to create an additional text box where you can fill out such a label.
- For “BE”, type “Belgium”
- For “FR”, type “France”
- For “NL”, type “the Netherlands”
- For “UK”, type “the United Kingdom”
Remember that these predefines were automatically inserted when we generated the question via batch create mode. Another reason to use batch create mode as much as possible, since you wouldn’t have known about the predefined options your clause author provided if you had manually inputted the question.
As a final bit of cleaning-up, have all the card and question titles that are still completely in lowercase start with a capital letter (e.g.: party1 – name) to ensure consistency.
Change sets
So far, we’ve only looked at the  ,
,  , and
, and  panes. For the purpose of this tutorial, we will also briefly discuss the
  pane. For more information on the features offered by this pane, click here.
If you navigate to the pane and click  , you will get an immediate overview of the things you can do via this pane.
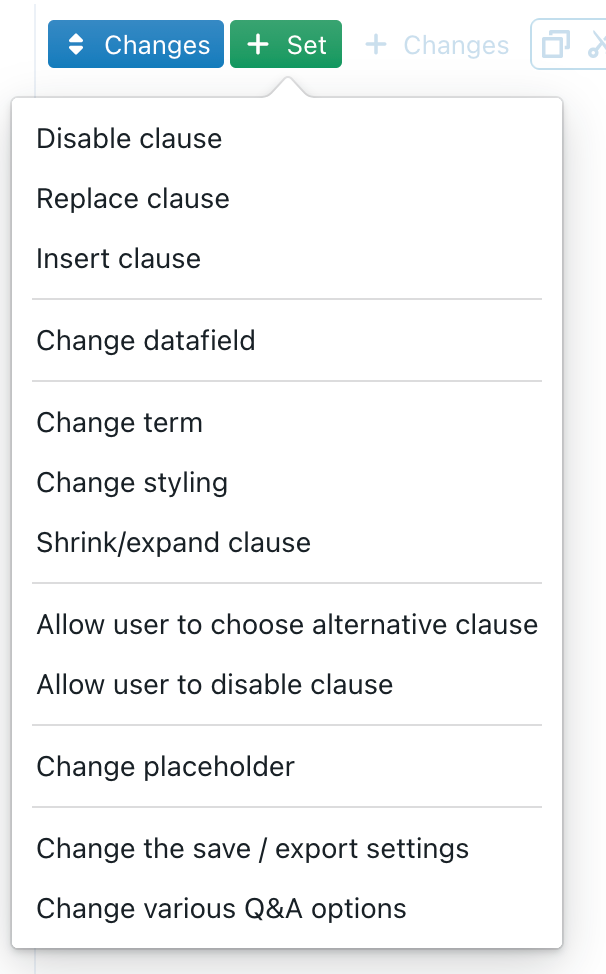
Change sets essentially allow you to make certain changes in the contract depending on certain conditions. For example, you could make a question in the pane where, depending on the answer to that question, a certain clause gets disabled or a term changed.
For the purpose of this tutorial, let’s look at the change set that allows a user to disable a clause.
Allow user to disable clause
While the inserting, removing, enabling, and disabling of clauses is generally best left to users who use assemble document mode, it is also possible to give Q&A users this option. Let’s try this out on the entire agreement clause (located under “Miscellaneous”).
- You should normally have your pane on the left-hand side of the screen and your pane on the right-hand side. If not, do this now.
- Scroll down to the entire agreement clause in the pane and select it by clicking on it, then click
 and choose the change set “allow user to disable clause”.
 - Give it the title: “Disable entire agreement clause”.
- Click
 .
.
If you return to the Simulation Context and scroll down to the entire agreement clause, you will see a trash bin icon now appears next to the clause:

Clicking this icon will disable the clause so that it does not appear when a document is exported to Word of PDF.
Distributing the questionnaire
Now that you’ve finished creating your questionnaire, click  and navigate back to your home screen. Under Q&A sessions, you should see the newly created questionnaire.
If you click on the questionnaire, you will see the option to create a so-called magic link (![]() ). Click it to receive a prompt allowing you to set the parameters for this magic link.
). Click it to receive a prompt allowing you to set the parameters for this magic link.
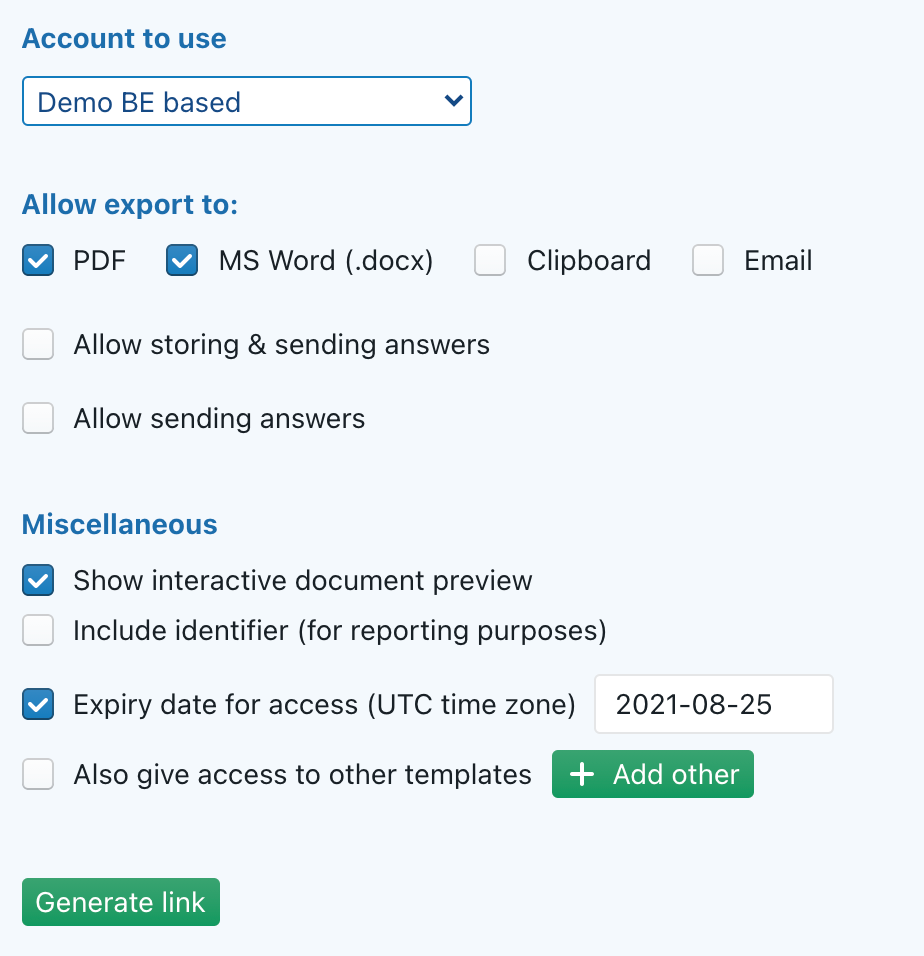
This magic link allows you to distribute the questionnaire to non-ClauseBase users. Simply tick the appropriate boxes for the freedom you want to give your answers and then click “‘generate link” to create the link. You can copy and paste this link in emails, intranet platforms, etc. for easy access by users who don’t have a ClauseBase account.
This concludes the Q&A tutorial! You are now ready to start creating questionnaires!