The base styling is the styling that is used as a basis for the headings, titles and bullet paragraphs. When calculating what a heading, title or bulleted paragraph should look like, ClauseBase will start from the base styling, and then merge that styling with the styling elements defined in the heading/title or bullet style.
At the same time, the base styling is also used as the styling of body paragraphs, i.e. paragraphs that do not act as titles, and do not have any number or bullet attached to them.
Alignment
The alignment of a paragraph — left, right, centered or justified — is straightforward for body paragraphs. For bullets and headings, however, the alignment option can get quite complex, so you may want to check the discussion there.
Note that if a paragraph does not have any bullet or number attached to it (i.e., a “body paragraph”), then it cannot have a hanging indent. Instead, it will then be treated as a left aligned or justified paragraph.
Paragraph spacing
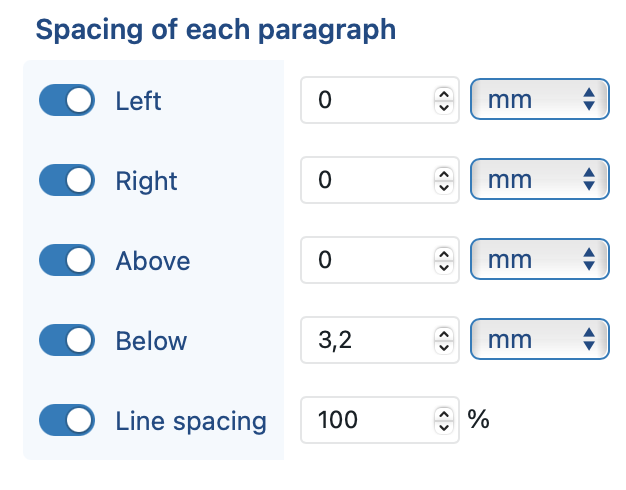
These settings define the amount of spacing at the left, right, bottom and upper side of each paragraph in the clause, as well as the spacing between each line of text.
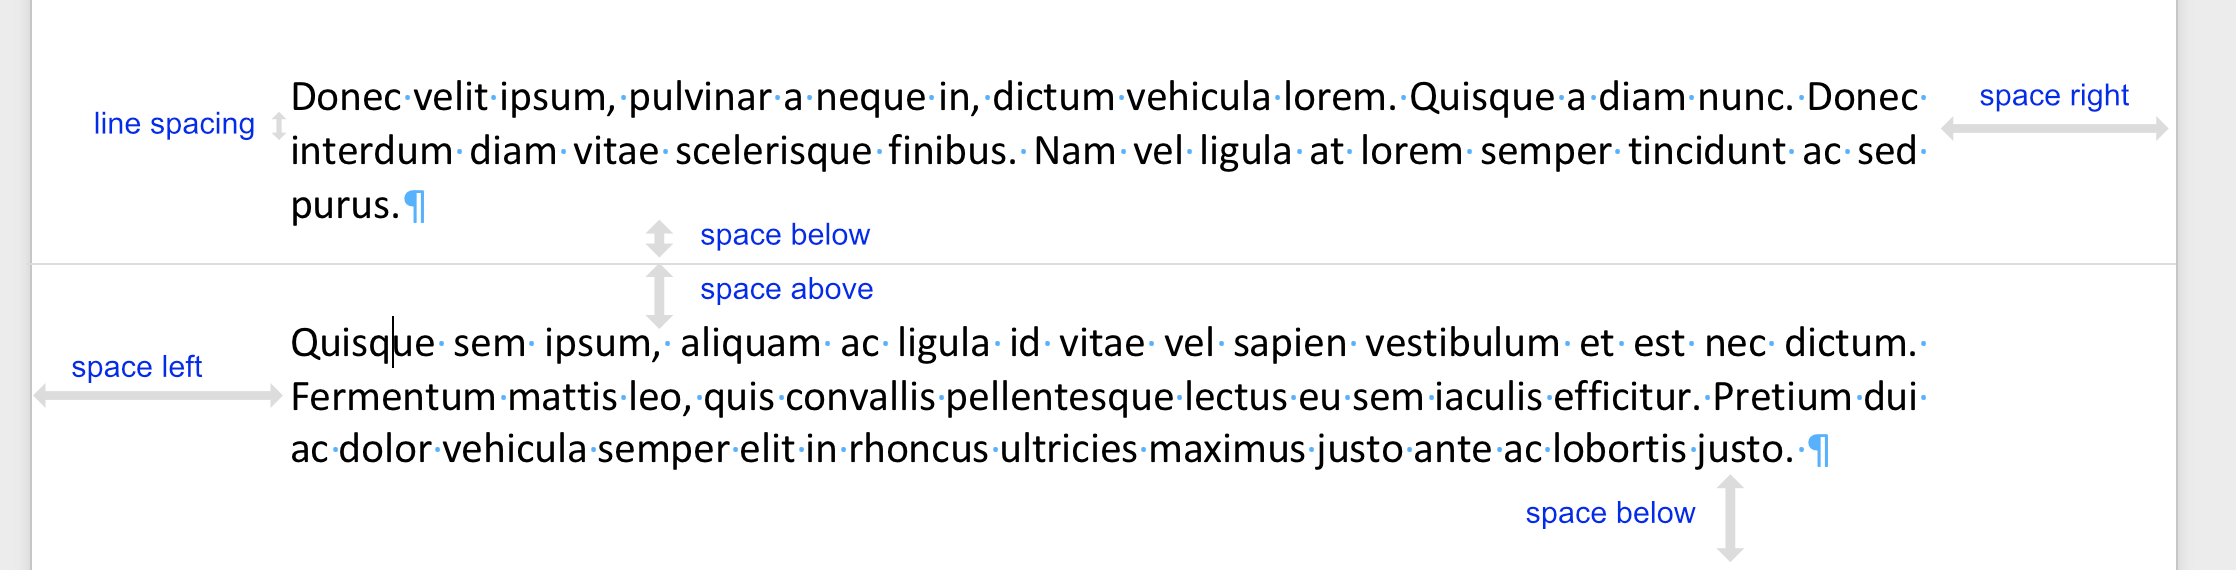
The space above & below is added to each and every paragraph in the clause. Hence, if there are three paragraphs in the clause, the space will be added three times. If instead you want to add space once above/below a clause, you need to use the block spacing setting that is additionally shown in the custom styling of the clause.
Most users of Microsoft Word are familiar with the spacing at the left side of a paragraph, due to the indent button in the toolbar of Microsoft Word. Most users are not familiar with the spacing above & below a paragraph, not only because these settings are hidden in Word’s paragraph settings dialog box, but also because it seems so much easier to simply hit Return/Enter to create a blank line. However, adding blank lines should be avoided, because it creates all kinds of problems.
Be aware that the left spacing of body paragraphs and bulleted paragraphs will be added to their left starting position, as calculated by the settings of the heading/title they reside under. For example, if a bulleted paragraph resides under a heading at level 1, and the settings for this heading at level 1 dictate that the body text & bullets residing have to start exactly at 5 mm, then the aforementioned starting position will be 5 mm. Any left spacing you would set for a body/bulleted paragraph will then be added to that 5 mm.
Thanks to its clause-based approach, ClauseBase naturally avoids this problem of extraneous blank lines.
Font settings
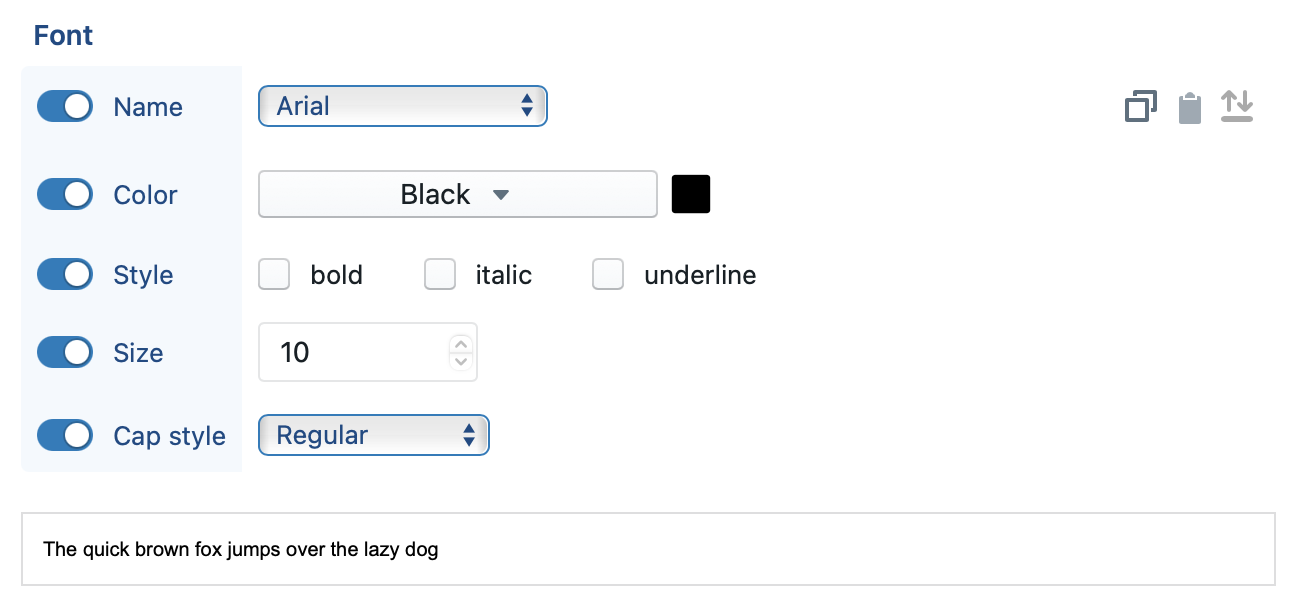
These settings are fairly straightforward, and should not require many explanations.Use the underline option sparingly, and use bold or italic instead. Underlining is a reminiscent from the past, when typewriters did not offer easy possibilities to create bold or italic text, so that underlining was often the only option to draw attention to certain text fragments. From a typographic perspective, underlining is problematic, because the lines cut through letters with parts below the baseline (such as a -g and -f). We are aware that some lawyers like to use them, but perhaps the switch towards document automation is a good moment to get rid of the old dinosaur?
ClauseBase allows you to select various Google open source fonts (Lato, Lora, Montserrat, Noto Sans/Serif, Open Sans, Roboto and Source Sans Pro). Please be aware that those fonts need to be installed on users’ computers, both to show them on the screen and to show them in Word/PDF files. They can be downloaded free of charge from https://fonts.google.com
With a few caveats, you can also use custom fonts.
Text flow settings
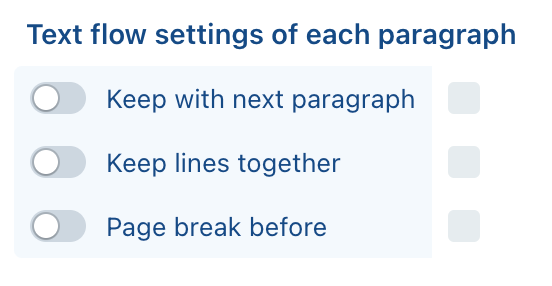
These settings correspond with MS Word’s paragraph settings:
- When enabled, Keep with next paragraph causes MS Word to keep a paragraph together with the subsequent paragraph (unless physically impossible because the edge of the paper has been reached). Typically you only want to enable this setting for titles: if you enable this for body paragraphs, then MS Word will try to fit all body paragraphs together on one page, which is usually impossible and often creates unpredictable holes of vertical white space on your page.
- When enabled, Keep lines together causes MS Word to keep all of the lines of the entire paragraph on the same page. In other words, when this setting is disabled, MS Word can split a paragraph over multiple pages if desired. If your document mainly contains relatively few paragraphs (4 to 5 lines long), then it is probably a good idea to enable this option; for very long paragraphs (10 lines or more), enabling this setting will create substantial vertical white space.
- Page break before causes a paragraph to always start on a new page. You will only want to enable this for titles.
Table settings
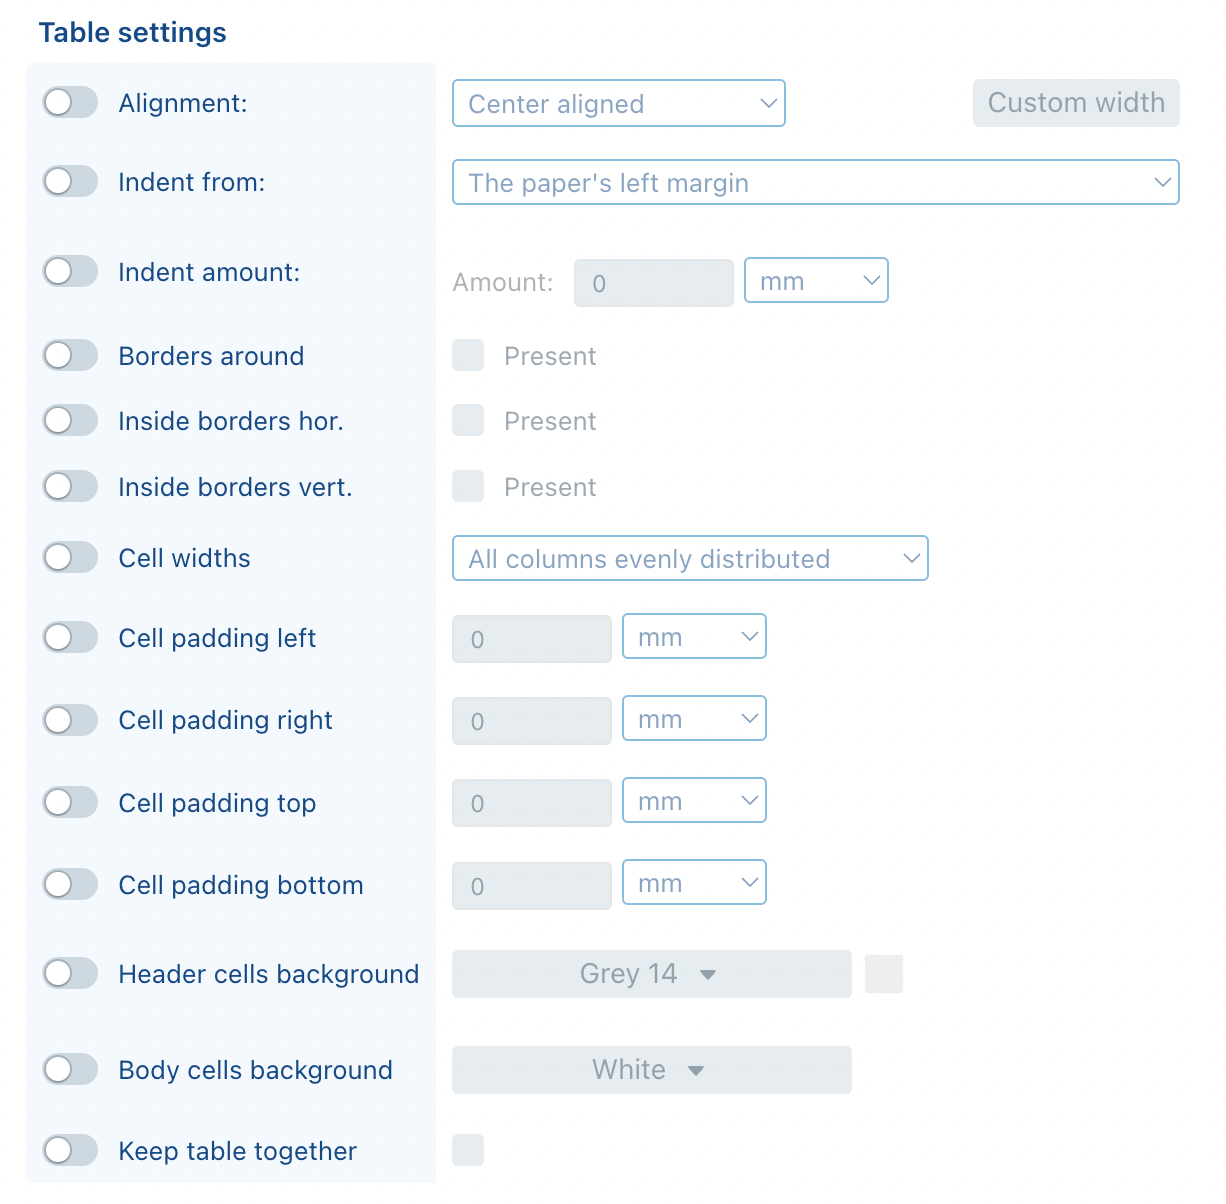
These settings allow you to configure a table’s alignment, width, borders, background and text flow.
- In the Alignment, you can choose between left/center/right alignment, or instead request the table to span the entire page width. If you choose left/center/right alignment, you can optionally specify a custom width percentage by clicking on the Custom width button.
- In the tree Borders settings, you can specify whether and how lines should appear around and inside a table.
- The Indent settings are discussed below.
- In the Cell widths settings, you choose between:
- Automatic width for every column causes each column to try to fit its contents. How this will exactly work out is somewhat unpredictable in MS Word, e.g. when two columns both contain a lot of text that will not fit horizontally on the page. While this is a good default setting, you may for some columns switch to any of the following options instead, to gain more predictable control over the column widths.
- All columns evenly distributed causes all columns to be evenly distributed over the remaining horizontal space
- First column x%, others evenly distributed which causes the first column to be 10/20/30/40/50% wide, and all subsequent columns to be evenly distributed over the remaining horizontal space
- Custom width in which you can specify a custom percentage for each column
- The four Cell padding settings allow you to specify the padding (i.e., inner margin) of each cell of the table.
- In the Background settings you can specify the (heading) cell’s background color.
- The Keep table together option will cause MS Word to try to keep the entire table on the same page, instead of splitting it over multiple pages.
The Keep table together option does not exist as such in MS Word, but because it is so frequently desired, ClauseBase offers this as a custom option. When enabled, then behind the scenes ClauseBase will activate the “Keep with next” option in each of the paragraphs within the table. In addition, it forces the “allow row to break across pages” to be set to false, even for a definition table (for which that setting is otherwise set to true).
Even when Keep table together is not activated, MS Word can sometimes be unpredictable in why it forces a table to be kept together on the same page, or why it causes a table to start on the subsequent page.
If this happens, you may want to check whether you used a heading row in the table (by insert ========= as the second row). When you use a regular (non-heading) row instead, then this bug in MS Word tends to disappear. While not related to ClauseBase, you may want to be aware of this behaviour.
Indenting tables
You can specify the left indentation of a table in different ways.
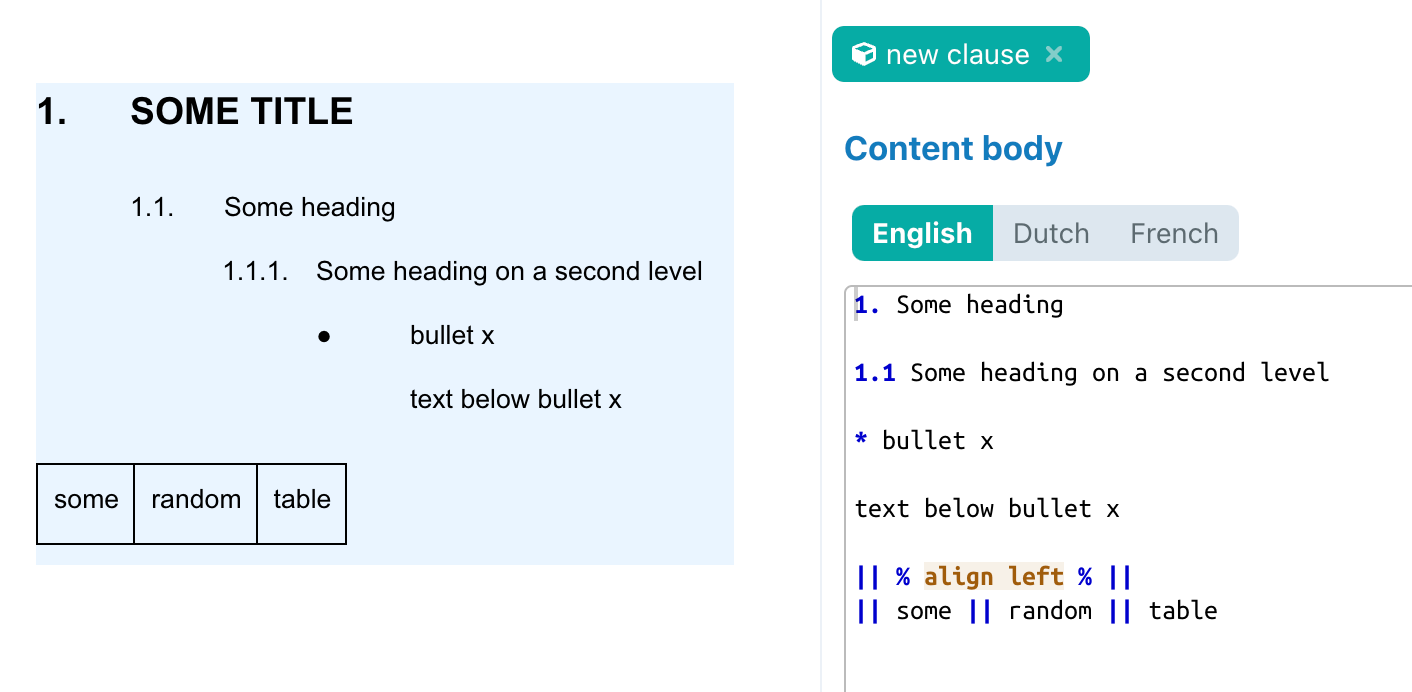
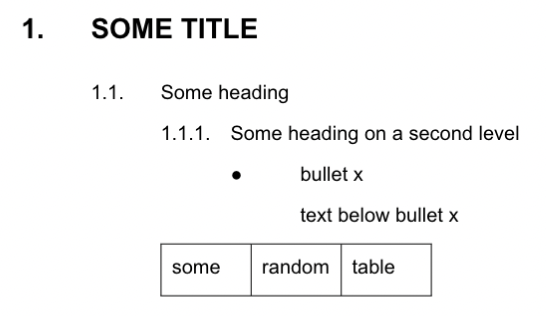
To illustrate the explanations below, we will use the following sample document (the table is forced to be left-aligned, to improve the visualisation of the left indentation):
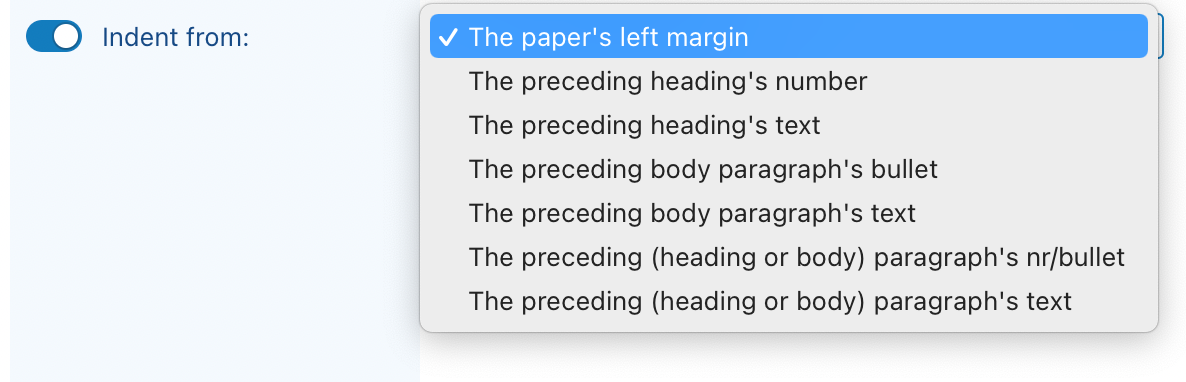
The simplest option is to use the The paper’s left margin. With this option, the left indent amount will be calculated from the left margin of the paper. With an indent amount of 5mm, this leads to the following result:

When set to any of the other options, the table’s left indentation will be calculated relative to the closest matching paragraph. These options therefore allow you to dynamically position a table, so that the table “follows” the indentation of its neighbouring paragraphs.
For example, when set to The preceding heading’s number and an indentation amount of 0, the result will be:
You can see that the table’s left side is now aligned with the number 1.1.1, which is the heading that is closest to the table.
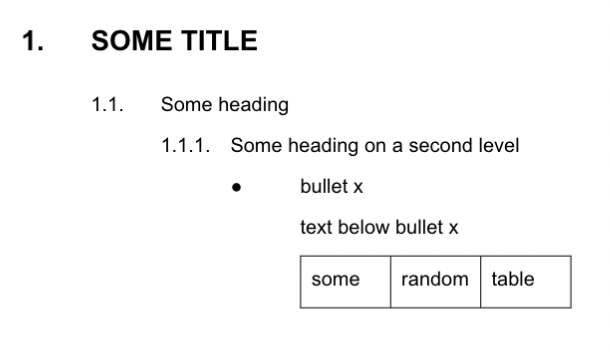
If you would instead use The preceding heading’s text, then the table will be indented to align with the text to the right of 1.1.1:
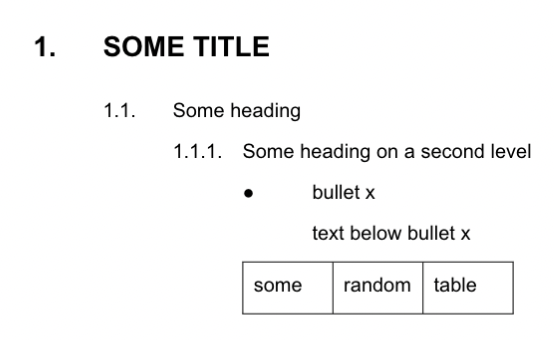
If you would instead choose The preceding body paragraph’s bullet then the result will be aligned with the left side paragraph “text below bullet x”. (This paragraph does not have a bullet, so the software will simply choose the left side of the word “text”).
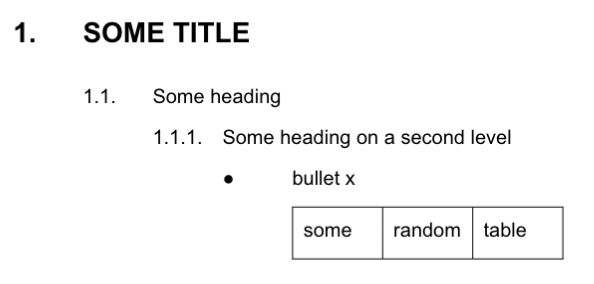
If the “text below bullet x” would be removed from the clause, then the result would become:

If the The preceding body paragraph’s text would be chosen, the result would become:
The final two options — The preceding (heading or body) paragraph’s nr/bullet and The preceding (heading or body) paragraph’s text — will not differentiate between headings and body text, and instead take any preceding paragraph to calculate the table’s left indent.