The globo-panel contains several handy features for advanced users. You can access it by toggling the ![]() icon at the upper-right side of the screen (next to your username).
icon at the upper-right side of the screen (next to your username).
Ask your administrator if this button is not visible, or if some of the sub-panels discussed below would happen to be invisible for you.
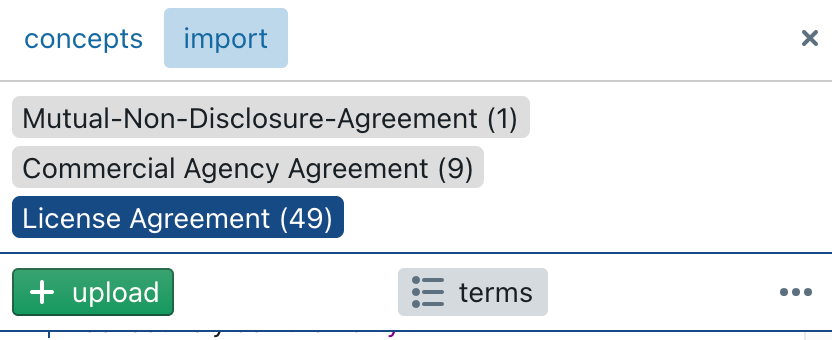
The globo-panel is permanently visible on the left side of the screen. The current modules are a concepts registry and a quick import module.
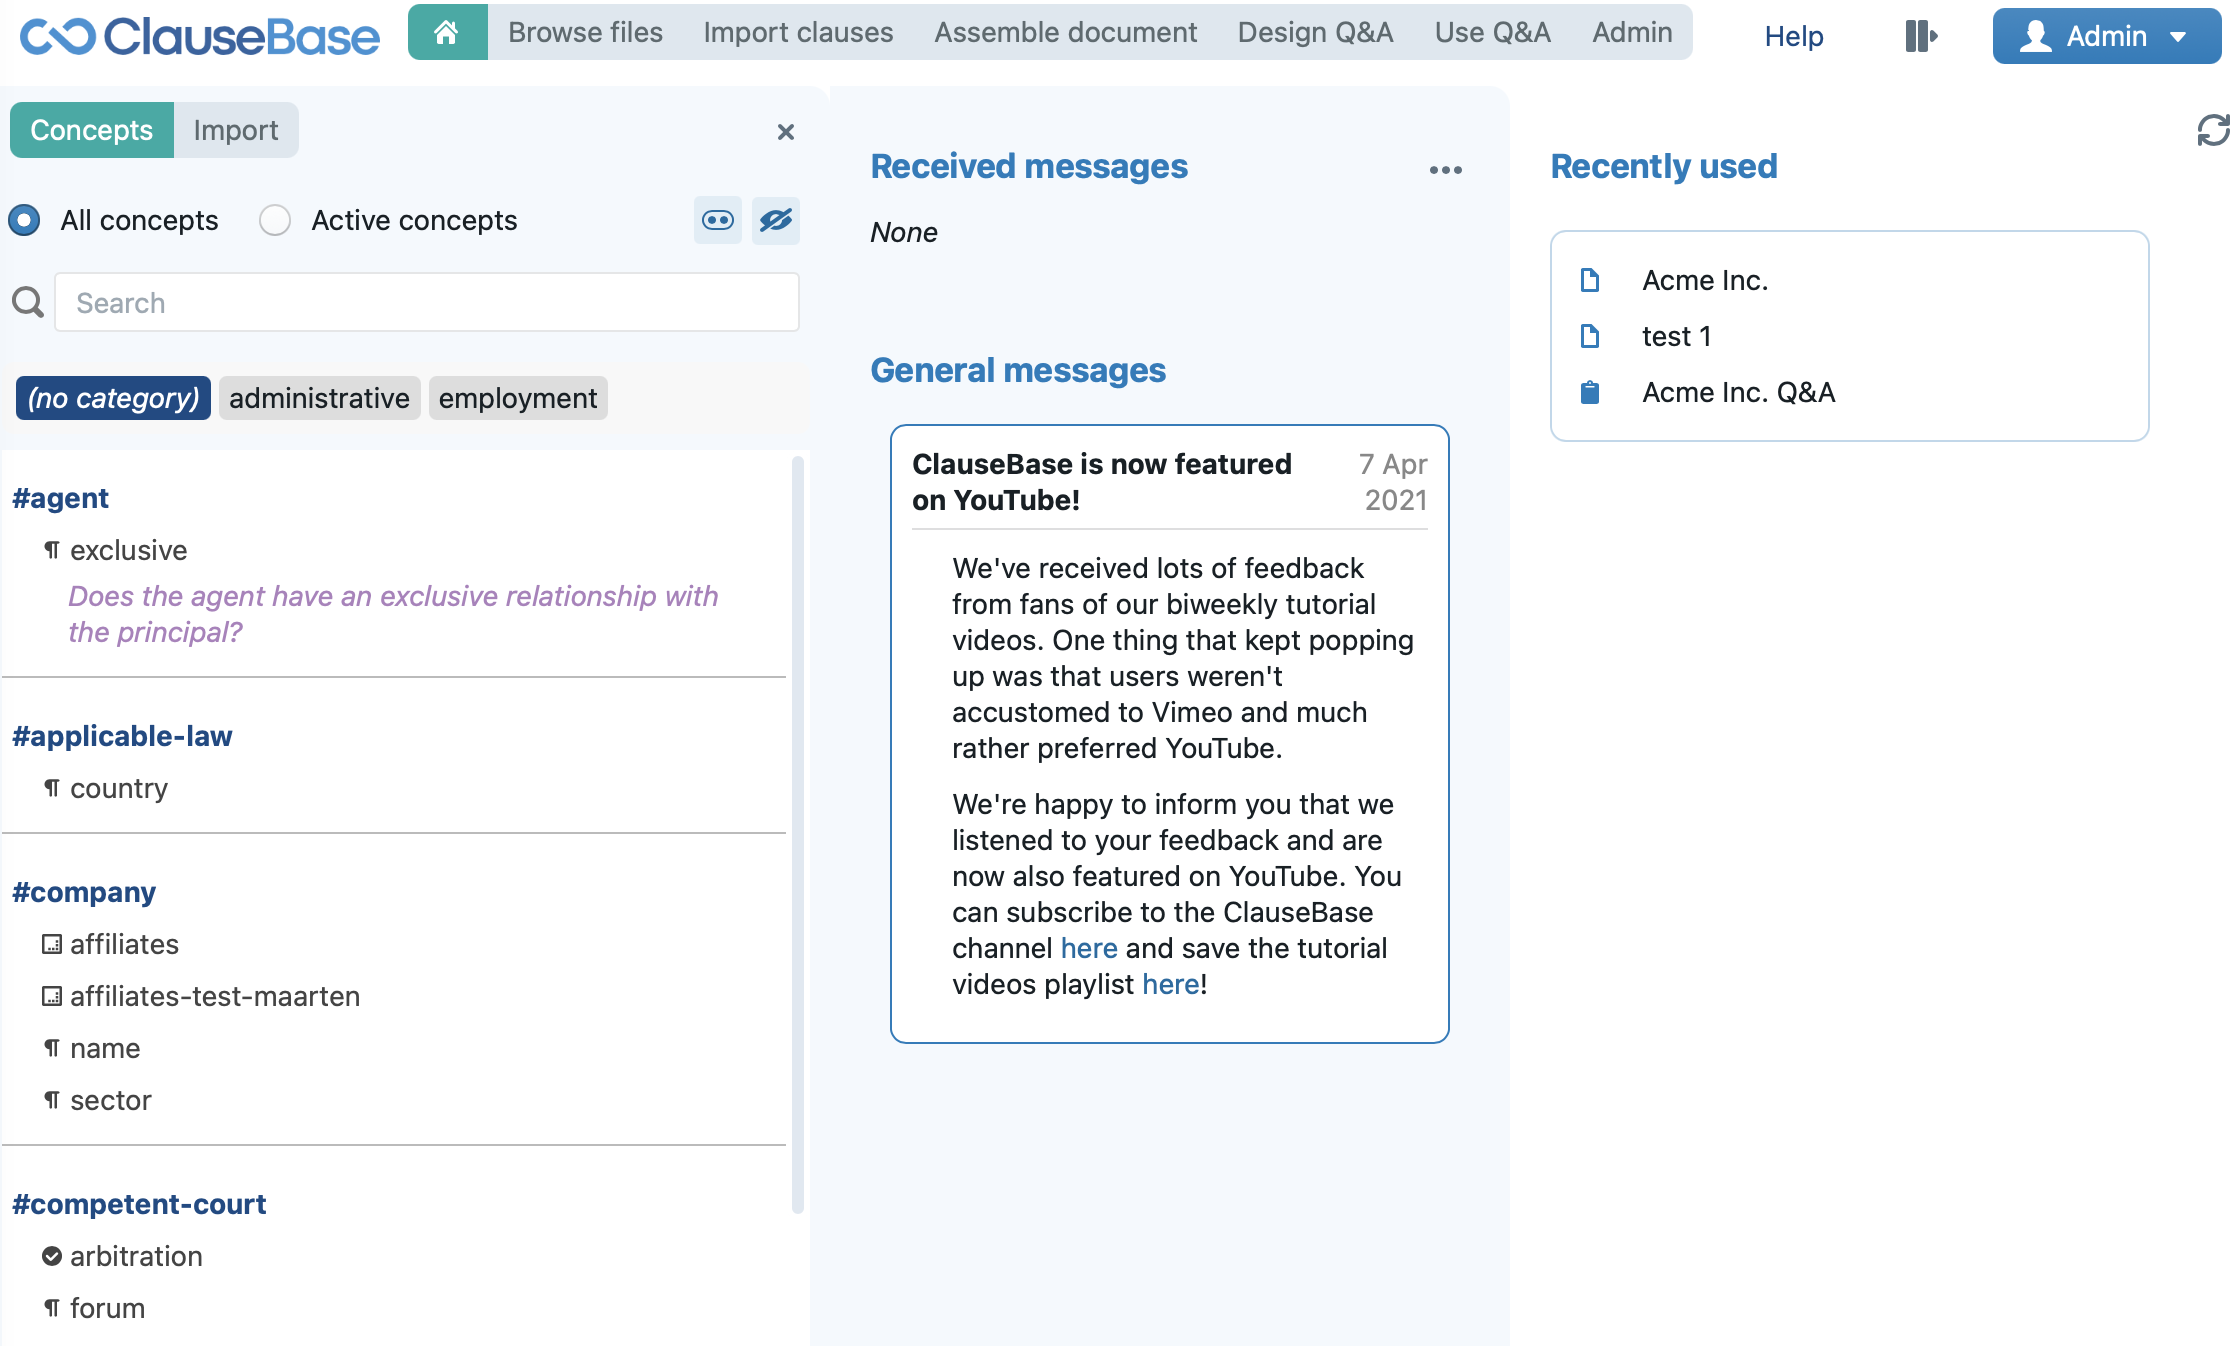
Concepts subpanel
The concepts subpanel allows you to get an exhaustive overview of all your concepts and datafields — either all concepts available to you anywhere in the system (“all concepts” option at the top), or all concepts available in the currently visible document/binder (“active concepts” option).
- With the
 button at the top right of the subpanel, you can toggle the visibility of the concept categories. When you have a lot of concepts visible in the subpanel, you probably want to leave this enabled.
- With the
 button you can toggle the visibility of concepts without datafields. If you are only interested in concepts with datafields, then you probably want to hide concepts without datafields.
 - You can easily search through the concepts using the search box. The search box allows you to search through a concept’s filename, its concept-labels, as well as the name/labels/aliases of each datafield of a concept (in any of the available languages).
Note that the concepts subpanel always shows you all information in your account’s primary language.
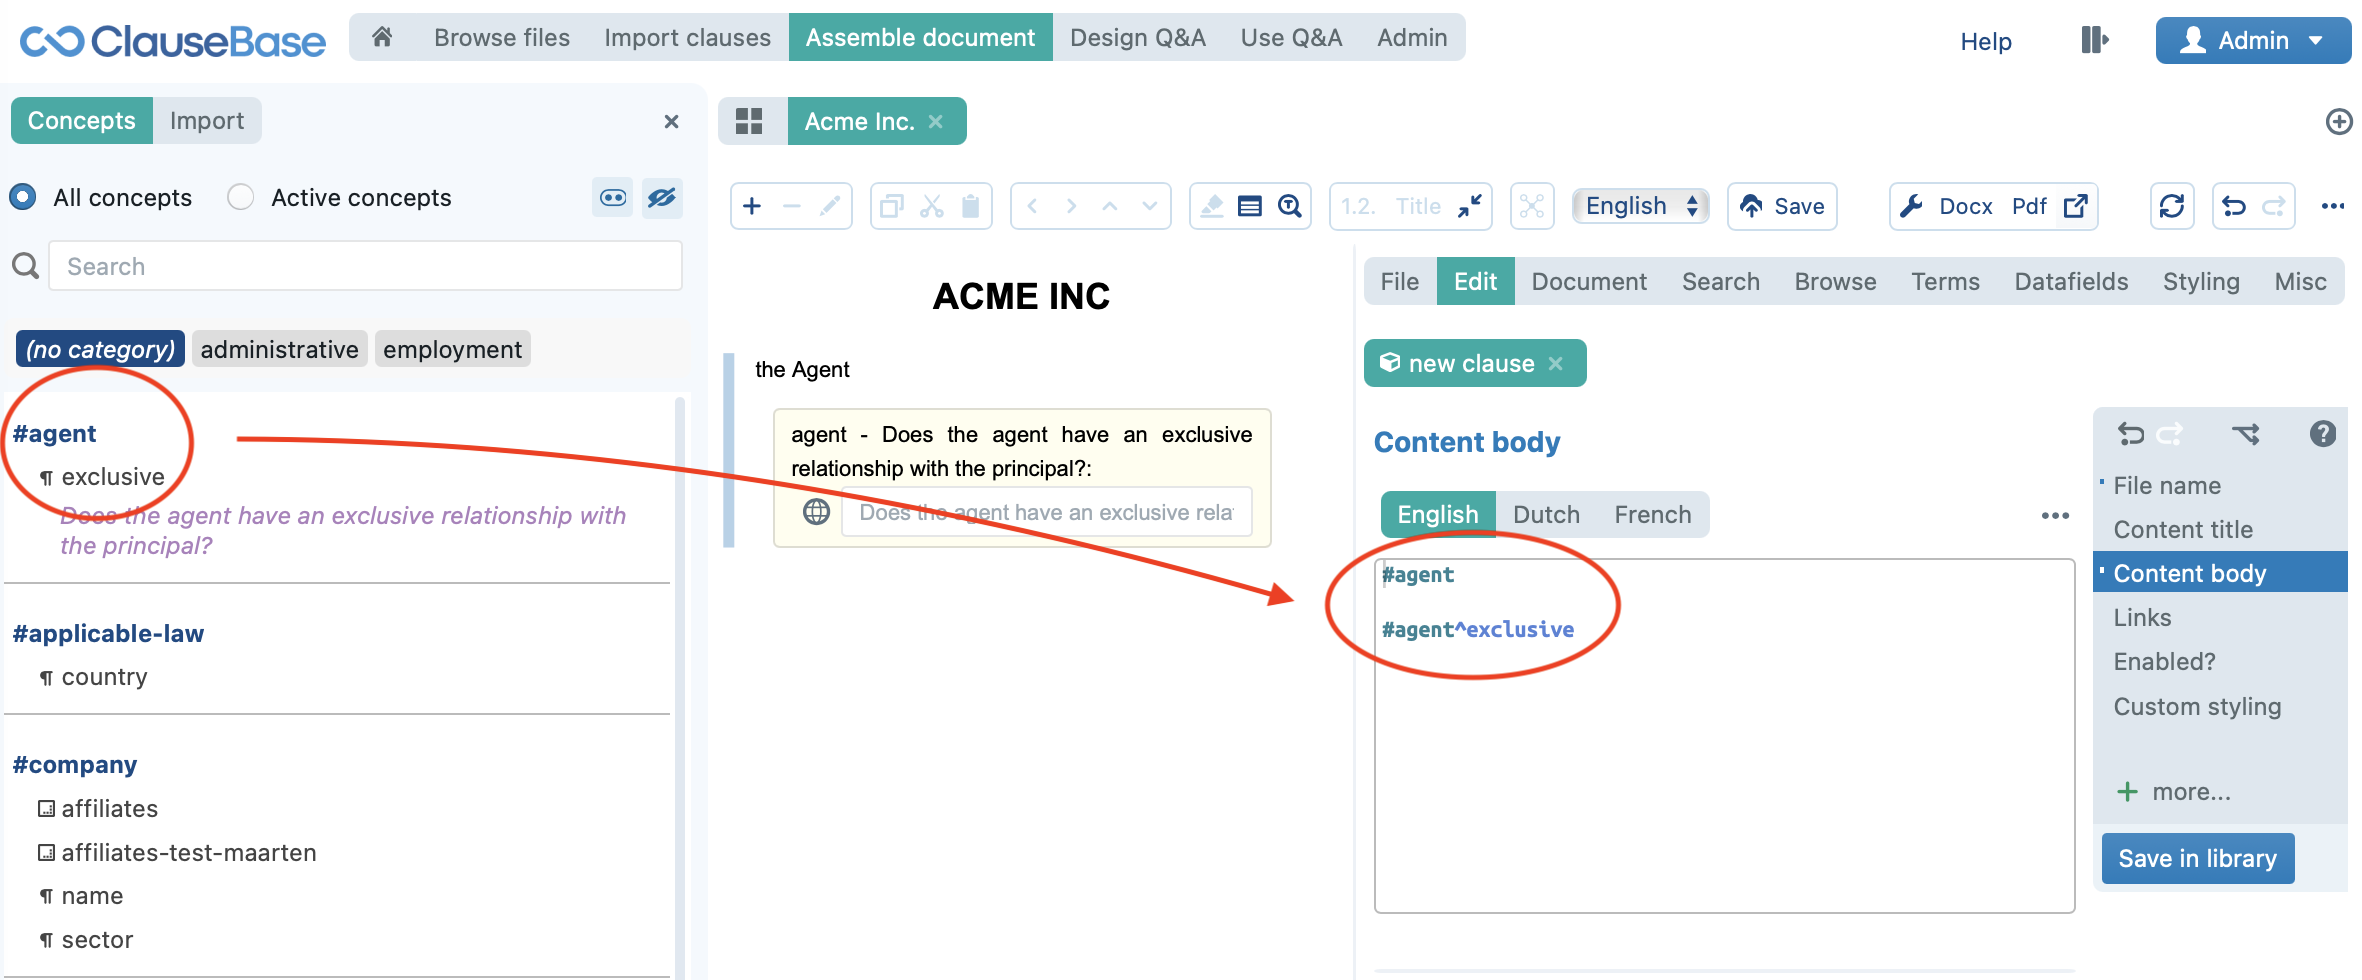
When a clause editor is opened in Assemble Document or Design Q&A, you can immediately insert a concept or any datafield by clicking on the hashtag of the concept or the name of the datafield.
Import subpanel
The import subpanel allows you to import one or more MS Word files, from which you can quickly insert clauses, with some partial cleanup, in an adhoc fashion.
This import subpanel is a light-weight, more adhoc-oriented version of the full-fledged import module.
Importing a file
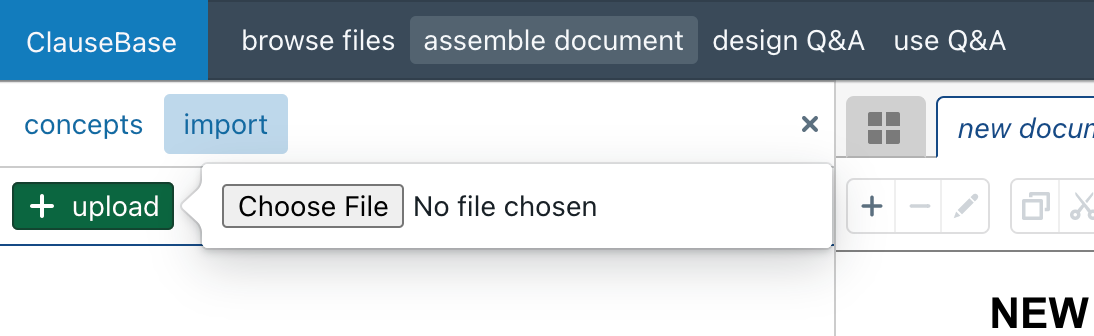
Your first step is to uploading a .DOC or .DOCX file by clicking on the  button and then navigating to some file on your local computer.
ClauseBase will automatically identify the language of the file and present it to you in the import sub-panel.
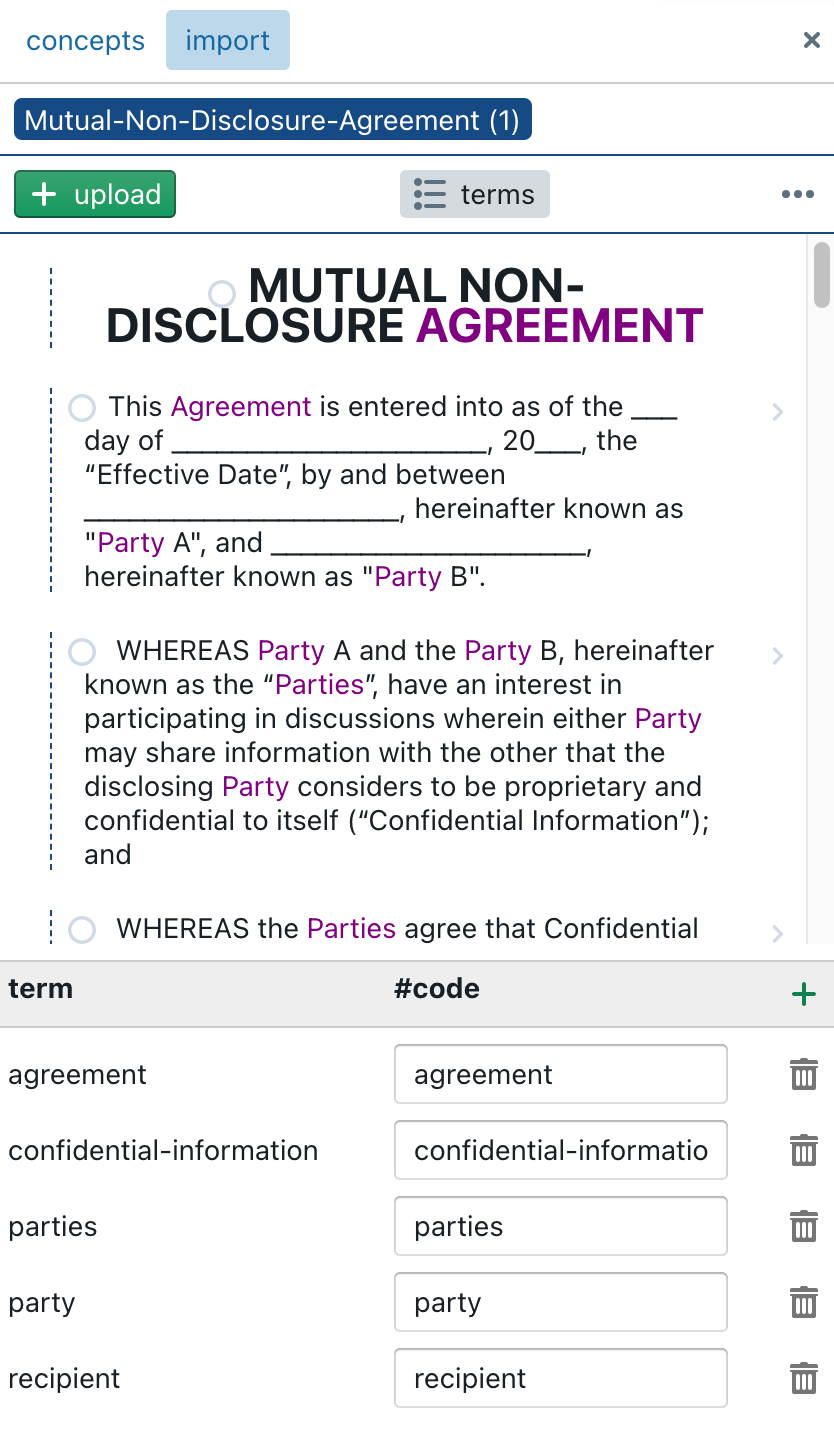
The system will also present you a list of all the frequently used capitalised terms in the file you uploaded (see the bottom part of the screenshot above). At any time, you can show or hide this terms-panel by clicking on the  button at the top of the Import subpanel.
Switching between open files
You can open multiple DOC/DOCX files at once, and then easily switch between them, simply by clicking on the document’s title near the top of the Import subpanel.
Opening multiple files can be particularly interesting when you having multiple language versions of the same document.
Closing and storing files
When you click on the ![]() button, a menu appears that allows you to:
button, a menu appears that allows you to:
- Close the currently uploaded DOC/DOCX document.
- Store the currently active DOC/DOCX document (including all the editing operations you’ve applied to it). Please note that ClauseBase will not automatically save the DOC/DOCX files, so they will get lost if you close your browser.
- Restore a previously stored DOC/DOCX document, with all its previously applied editing operations.
Note that the DOC/DOCX document is not saved on ClauseBase’s servers, but is instead stored within your local browser. (Hence, if you access ClauseBase from another machine, that DOC/DOCX document will not be accessible.)
Please treat this local storage as a temporary solution only — you should not expect to store the DOC/DOCX file in your browser for prolonged periods. But in light of the intended purpose of the Import subpanel (allowing you to easily copy/paste text from a DOC/DOCX file), this is probably not your intention anyway.
Reordering clauses
ClauseBase applies several techniques to dissect your split your DOC/DOCX file into separate clauses. However, depending on the formatting and the complexity of this file, you will likely encounter errors.
For example, in the screenshot below you will notice that, while 13.1 and 13.2 were correctly identified as being subclauses of 13, the “IN WITNESS WHEREOF” paragraph was incorrectly identified as a sub-paragraph of 13.2. You can correct these errors by clicking on the ![]() buttons at the right side.
buttons at the right side.
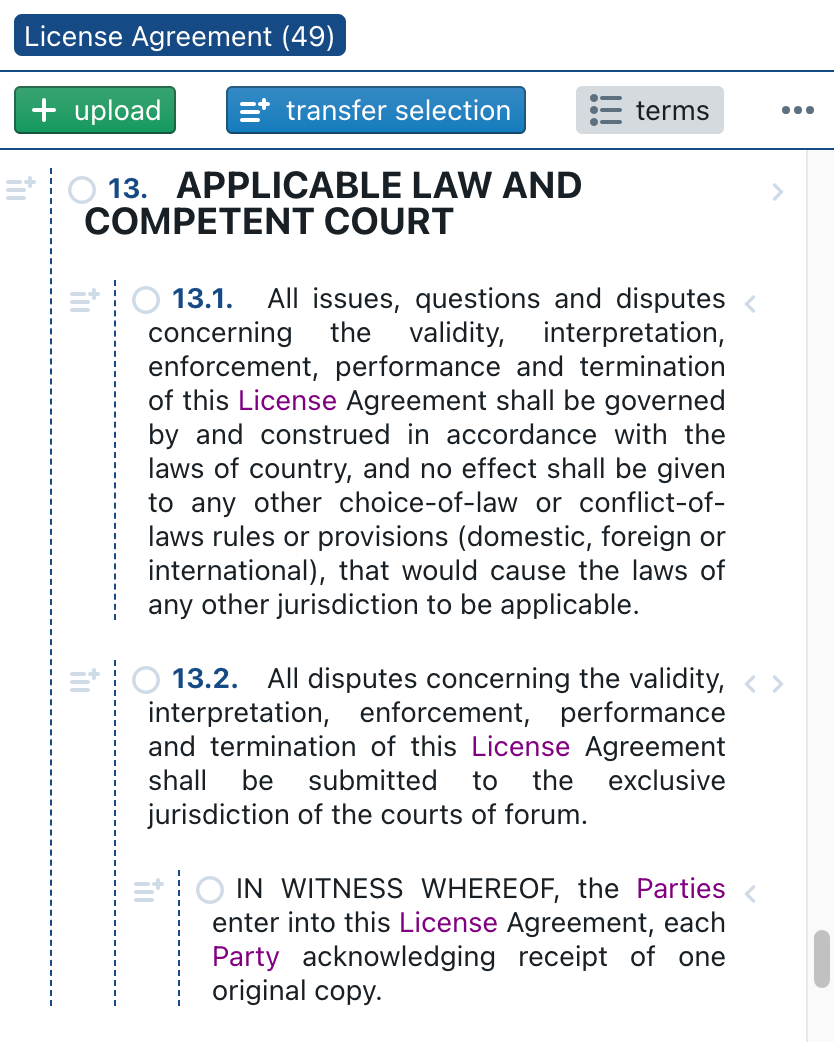
It is usually not necessary to completely restructure the uploaded DOC/DOCX file, as you probably want to copy/paste only some fragments. You can therefore focus your efforts on the clauses that are relevant for you.
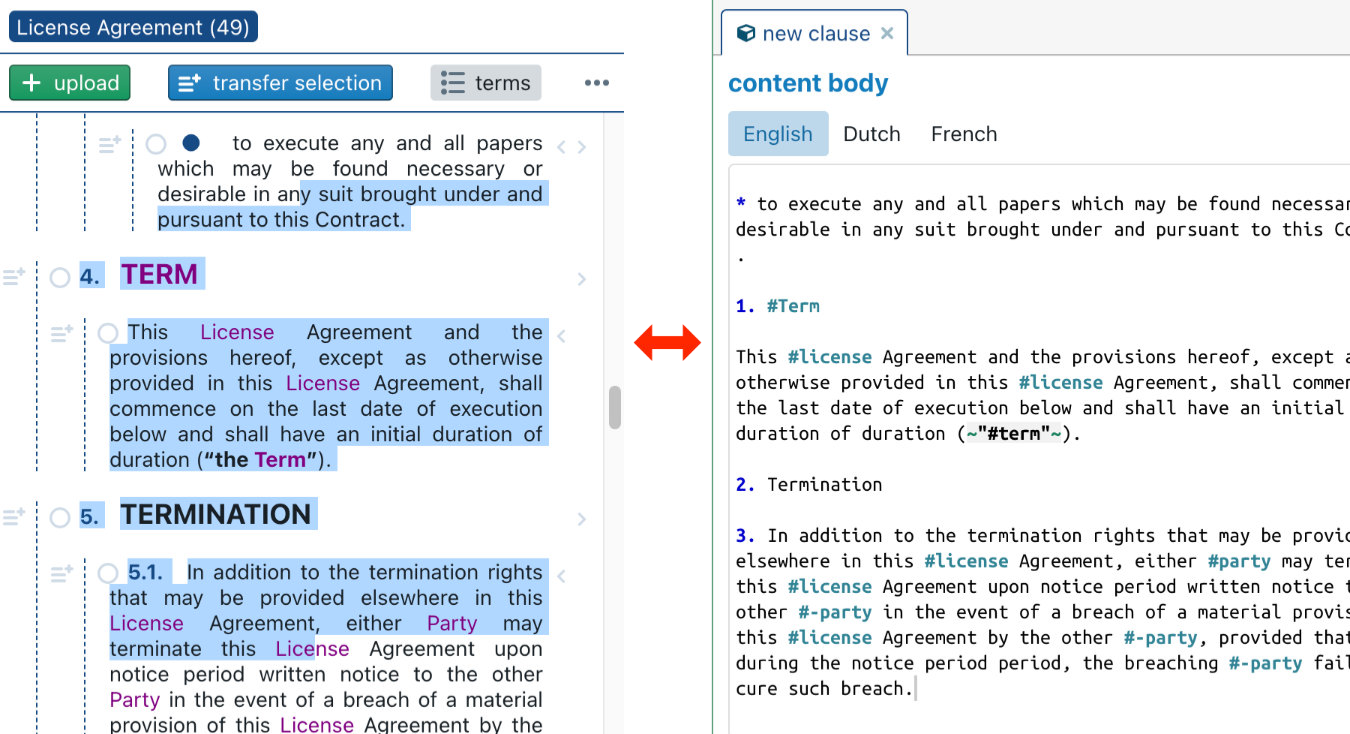
Copy/pasting clauses
The ultimate goal of the Import subpanel is to easily copy/paste text into the clauses you are constructing within ClauseBase.
The Import subpanel offers two different ways you can copy/paste:
A first method is to use the ![]() buttons that are shown on the left side of each clause. (These buttons will only be visible when you are the Assemble Document or Design Q&A mode and have opened some clause at the right side). If you click this button, then the clause to its right — including all its “child” clauses and “grandchild” clauses — will be pasted into the content body body and (where relevant) content title boxes. Please note that the existing content of these boxes will be completely replaced.
buttons that are shown on the left side of each clause. (These buttons will only be visible when you are the Assemble Document or Design Q&A mode and have opened some clause at the right side). If you click this button, then the clause to its right — including all its “child” clauses and “grandchild” clauses — will be pasted into the content body body and (where relevant) content title boxes. Please note that the existing content of these boxes will be completely replaced.
With this first method, it is very important that you correctly structured — using the buttons ![]() — the various paragraphs of the clause you are importing.
— the various paragraphs of the clause you are importing.
You should be aware that the contents is pasted into the boxes of the relevant language. For example, if your source document is in English and your current clause at the right side is showing the French contents, you will not see anything happening on the screen.
A second method is to select one or more sentences or paragraphs by dragging with your mouse, and then clicking on the  button at the top. This will cause the selected paragraphs (even if only partially selected) to get pasted into the currently active box at the right side.
Whichever method you use, you will notice that immediately afterwards, the paragraphs you imported will get turned into green, and that a green checkmark appears next to them at the left side. This can help as a reminder that you already imported these paragraphs.
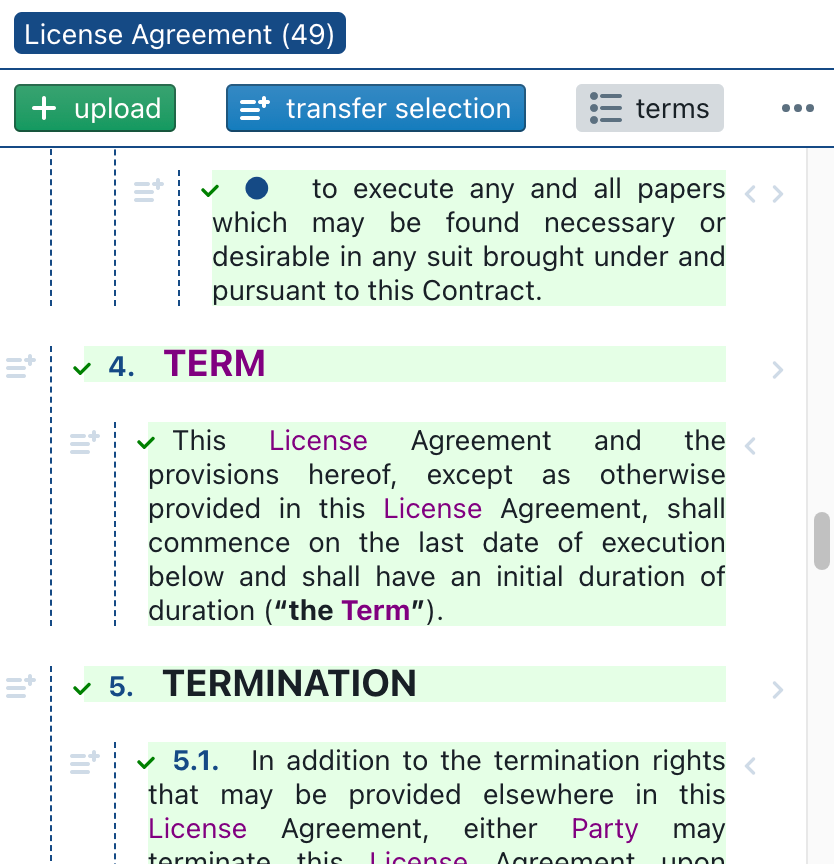
Flags
Each paragraph in a clause can have one of three states:
- Normal state
 — this means that the paragraph has not been disabled, and not yet been processed.
 - Done state
 — this means that the paragraph has already been imported. A paragraph that was copy/pasted into the right side, will automatically receive this state.
 - Skip state
 — this means that the paragraph will be skipped upon import.
At any time, you can click (or double/triple-click) on the icon to switch a paragraph into another state.
Defined terms
By clicking on the button, you can toggle the visibility of the terms panel at the bottom.
This terms panel can be used to indicate how capitalised terms should be converted into #tags when copy/pasted into the right side. For example, in the screenshot below, you will see that the terms “license” and “party” were both flagged as defined terms. (ClauseBase automatically recognised these capitalised terms, as they were used at least 3 times in a document outside the start of a sentence.)
When you would copy/paste this text into the right side, the defined term “license” would be shown as “#license”, while the term “party” would be shown as “#person”. In other words, you are free to choose another code to use with a hashtag.
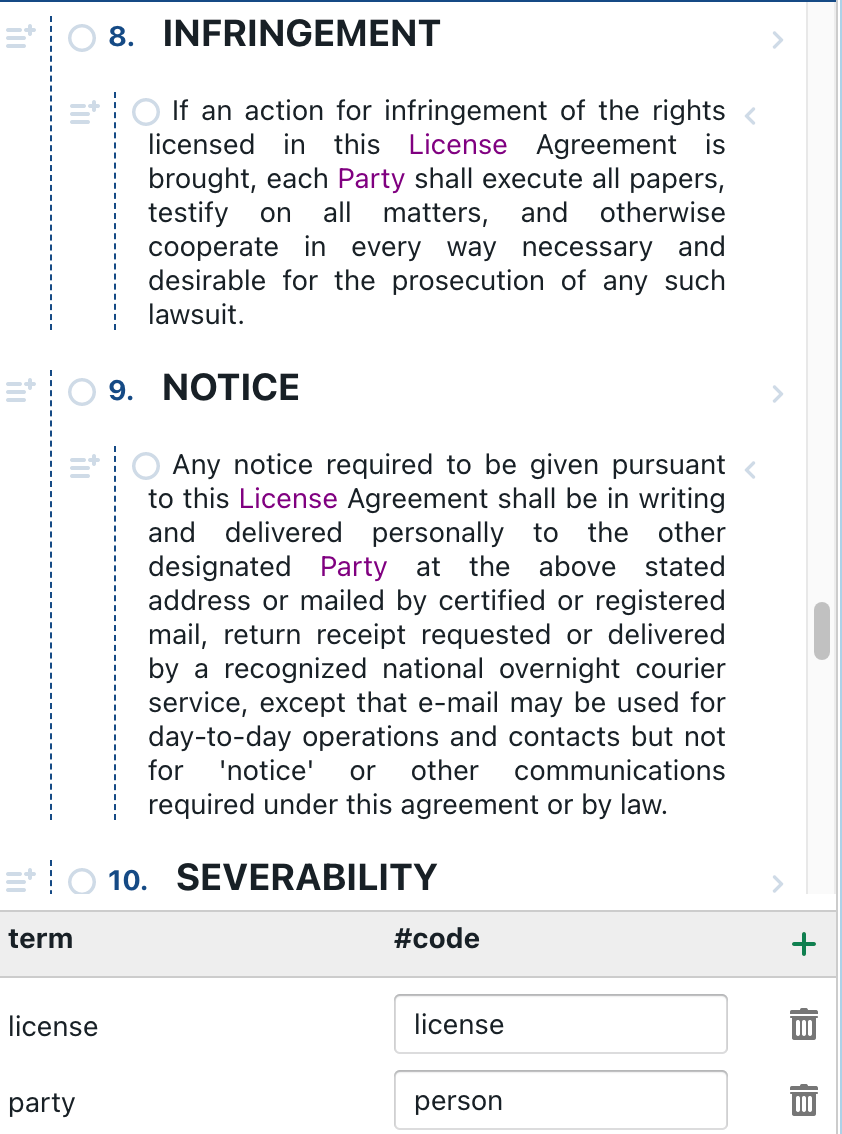
You can also defined new terms by clicking on the green + at the right of #code. When doing so, you will notice that any term in your source document will immediately be shown in purple. Conversely, when removing a term by clicking on any of the trashcan icons, the terms will turn black again, and will no longer be treated in a special way.